Looking for hardware solutions that meet European / American standards?
Use this guided inquiry modal to move from a generic quote form to a clearer technical conversation. Buyers can choose whether they need pricing, CAD / 3D files, or OEM / ODM support before sharing contact details.
Compatibility-first design across door / window systems
Repeatable production with clear inspection checkpoints
Documentation and change control for long-running programs
Responsive engineering support for fit and field feedback
When a hardware schedule begins with finish names and catalog codes instead of opening geometry, panel weight, handing, exposure, egress, accessibility, traffic, and seal compression, the specification becomes a shopping list rather than an engineering document.
Why keep doing it?
I use a blunt rule: classify the opening before selecting the hardware. A hinged entrance door, a sliding patio door, a casement window, and a bedroom egress window may all need a handle and a lock, but that does not make their hardware interchangeable.
The opening dictates the movement. Movement dictates the load path. The load path dictates the hinges, rollers, operators, locks, keepers, fasteners, and reinforcement.
That is the order.
The Door and Window Hardware Checklist at a Glance
The table below is the working core of a hardware checklist by opening type. It is not a substitute for local codes, tested assembly requirements, project specifications, or manufacturer instructions. It is the starting point that prevents obvious omissions before procurement begins.
Opening type
Core hardware set
Conditional components
What must be verified
Hinged exterior door
Hinges, lever or pull, latch or multipoint lock, cylinder, strikes or keepers
Closer, threshold, weather seals, door viewer, access control
Door weight, handing, backset, PZ centres, exposure, seal compression
System compatibility, sash weight, sequence, compression
Egress or child-risk window
Operable latch, hinges or balances, clear release path
Window guard, opening control device, removable restrictor
Egress dimensions, release method, fall risk, local rules
Fixed window
Setting blocks and glazing components
Removable stops, maintenance access fittings
Glass support, drainage, replacement access
Before assigning product codes, compare the opening against a complete door and window hardware range. Buyers often discover too late that the selected handle, lockcase, hinge, and keeper belong to separate product families with different fixing patterns.
Door Hardware Checklist by Opening Type
Hinged Exterior Entrance Doors
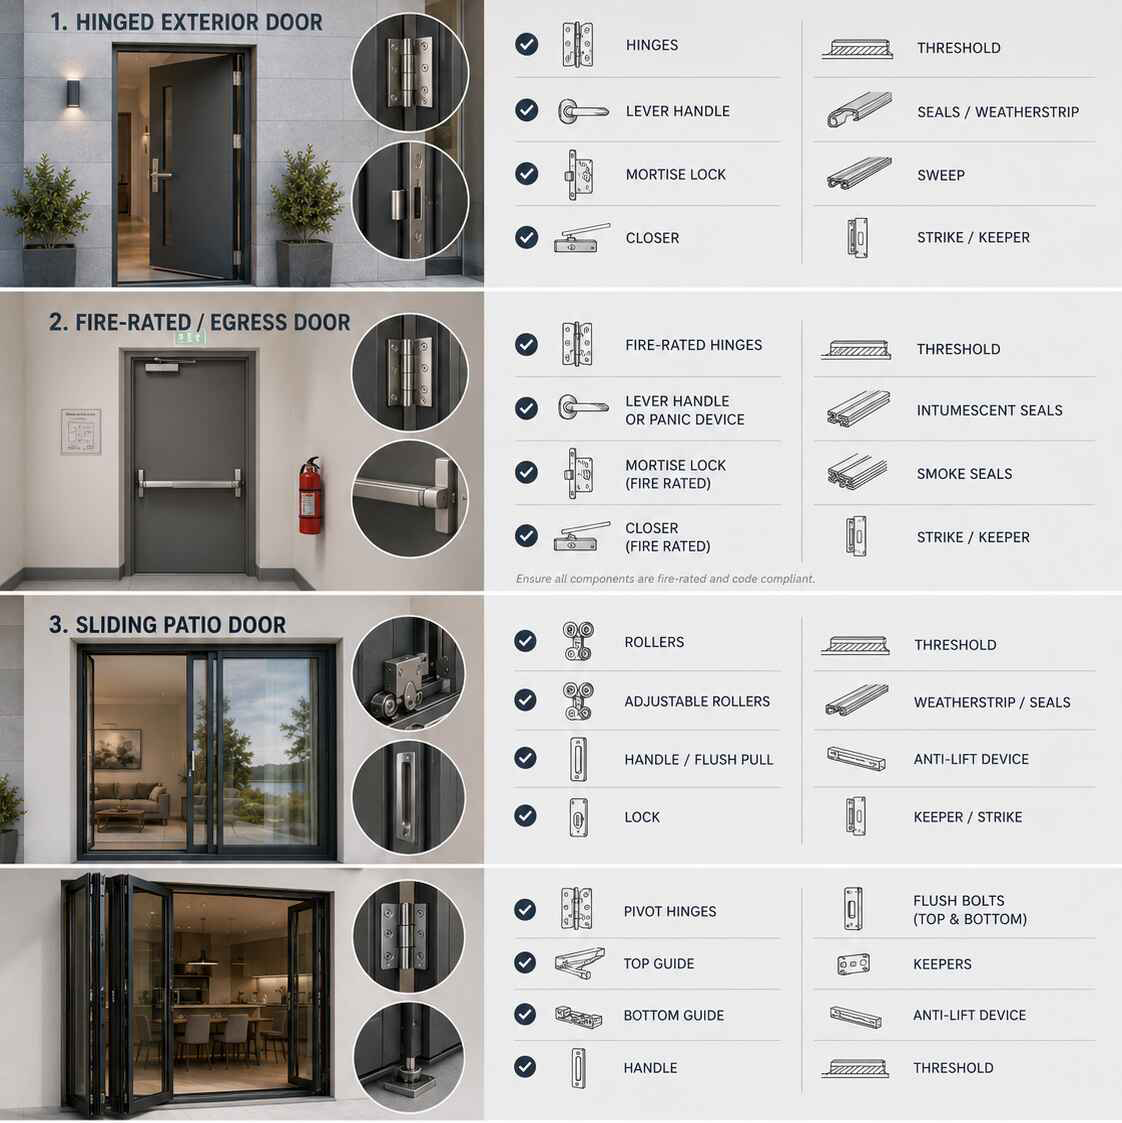
A hinged exterior entrance door needs more than a lock and two handles. It needs a coordinated mechanical system capable of carrying the leaf, controlling alignment, resisting weather, maintaining gasket pressure, and surviving repeated use.
Start with this door hardware checklist:
Load-rated butt hinges, ball-bearing hinges, pivots, or concealed hinges
Exterior and interior lever handles, pull handles, or handle sets
Tubular latch, mortise lock, deadbolt, or multipoint locking system
Cylinder, thumbturn, keying components, and escutcheons
Matching strikes, multipoint keepers, or reinforced receiving plates
Threshold, sill interface, door bottom, and perimeter weather seals
Door stop, overhead stop, closer, or hold-open device where permitted
Security fasteners and frame reinforcement
Kick plate, push plate, or edge protection for high-traffic openings
Do not size hinges from door width alone. Verify leaf height, total installed weight, center of gravity, closer force, projected loads, frequency of use, and frame fixing strength.
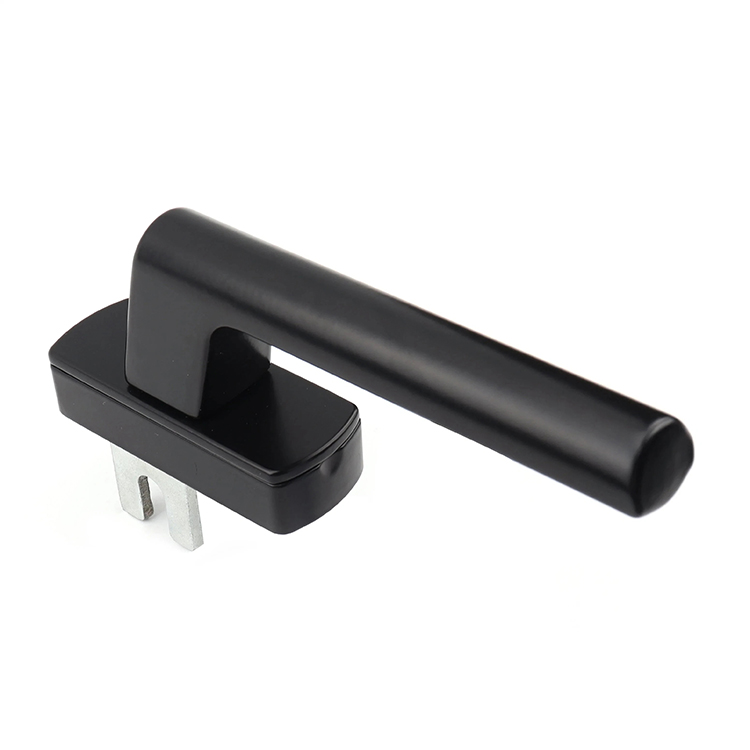
And do not buy handles by appearance. Compare the spindle, fixing centres, cylinder layout, plate dimensions, handing, spring return, projection, and grip clearance across the available door and window handles.
For aluminum, composite, timber, and uPVC entrance doors, multipoint hardware can improve perimeter compression and distribute engagement along the frame. But more locking points do not automatically produce a better door. A poorly reinforced keeper or misaligned gearbox can turn a five-point system into a five-point complaint.
The better route is to compare the lockcase, rods, hooks, rollers, bolts, keepers, cylinder, handle, gaskets, and hinges as one system. The site’s multi-point lock engineering guides provide a useful next step for dimensions such as backset, PZ centres, faceplate width, spindle size, and locking-point position.
Interior Passage, Privacy, and Office Doors
Interior hardware looks simple because weather resistance is usually less demanding. That simplicity is deceptive.
A passage door may need only hinges, a latchset, lever handles, and a stop. A restroom door may add a privacy function, emergency release, occupancy indicator, closer, or kick plate. An office door may require key control, electronic access, acoustic seals, or a concealed closer.
Use this minimum checklist:
Hinges matched to door weight and frame preparation
Passage, privacy, classroom, office, storeroom, or communicating function
Lever or pull geometry suitable for the intended users
Strike plate aligned with the latch path
Wall, floor, hinge-pin, or overhead stop
Closer where the operational or code requirement calls for one
Protection plates in service corridors or cart-traffic areas
Acoustic, smoke, light, or privacy seals where specified
The hard truth is that “standard office lock” is not a complete specification. It does not define who can enter, who can exit, whether the outside lever locks, whether a key retracts the latch, or whether emergency release is required.
Write the function in plain language before assigning a product number.
Fire-Rated and Means-of-Egress Doors
Treat a fire-rated door as a listed opening assembly, not a door slab decorated with fire-resistant components.
The checklist may include:
Hinges or pivots permitted by the tested assembly
Positive-latching lockset or exit hardware
Door closer or approved self-closing arrangement
Smoke, perimeter, and meeting-stile seals where required
Coordinator for certain pairs
Compatible astragals, flush bolts, and protection plates
Threshold and door-bottom components
Signage and access-control interfaces
Approved fasteners and factory preparations
Do not field-drill, trim, weld, or substitute parts simply because they appear mechanically compatible. Confirm the door label, frame label, hardware listing, preparation limitations, and approval requirements with the applicable authority.
A 2010 NIST dormitory fire experiment found that a closed door between the fire room and corridor limited the spread of smoke and gases. That finding should change how buyers think about closers, latches, hinge alignment, and door binding: the door must actually close and latch in service, not merely pass a visual inspection on installation day.
Sliding Patio and Large-Panel Doors
Sliding door hardware failures usually begin in the rollers and show up at the lock.
A panel drops slightly. The interlock shifts. The keeper is now 2 mm too high. The user pulls harder on the handle. Then the gearbox, hook, or mortise lock gets blamed.
Check the complete set:
Rollers rated for the installed panel weight
Roller adjustment range and access
Head and sill guides
Pull handle, recessed handle, or lift-slide handle
Mortise latch, hook lock, double-hook lock, or multipoint system
Keeper geometry and reinforcement
Anti-lift blocks or panel-retention devices
Exterior cylinder or keyed access where required
Soft-close damper where suitable
Drainage paths that remain clear after hardware installation
ANSI/BHMA A156.14-2024 covers residential and commercial sliding and folding door hardware, while FGIA’s current hardware catalogue identifies AAMA 906-21 for sliding-door and lift-slide roller assemblies. Those standards do not select the product for you, but they provide a better basis than a supplier’s unsupported claim of “heavy duty.”
Folding and Bifold Door Systems
Folding panels magnify small alignment errors because several leaves must move, pivot, carry load, and stack in sequence.
A folding-door set can include:
Top or bottom carriers
End pivots and intermediate pivots
Panel-to-panel hinges
Track and guide assemblies
Main operating handle
Lockcase, cylinder, and keepers
Flush bolts for secondary leaves
Magnetic catches or holdbacks
Panel aligners
Floor guides and stops
Specify the operating sequence. Identify the traffic door. Record whether the system stacks inward or outward. Confirm where the lock engages when the panels are compressed.
I would also require a full-size operating sample for any custom folding system. A loose hinge sample and a polished handle do not prove that six panels will stack, seal, lock, and reopen without binding.
Window Hardware Checklist by Opening Type
Casement and Awning Windows
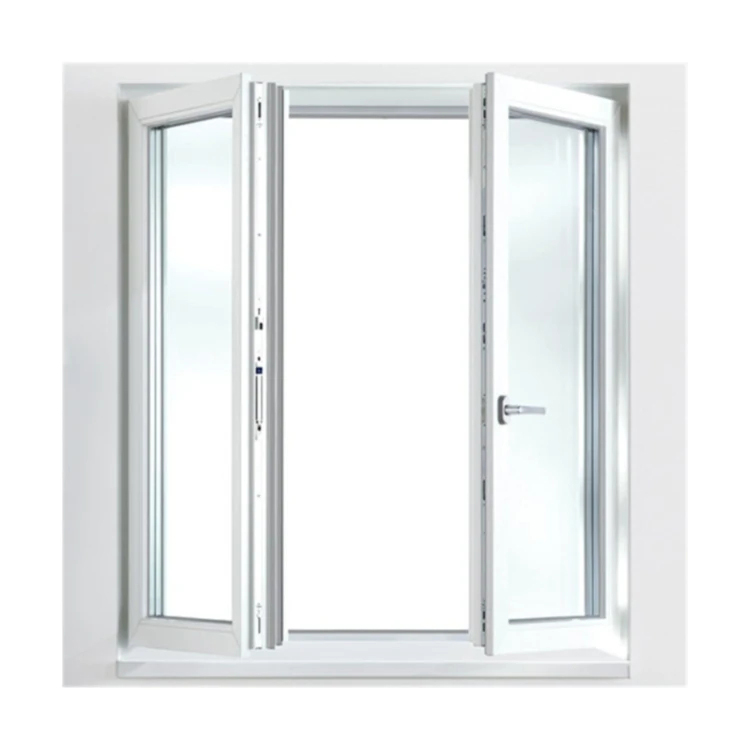
Casement and awning windows rely on hinges, stays, operators, and locking points to control both movement and compression.
The typical window hardware checklist includes:
Friction stays, butt hinges, or projected-window hinges
Manual handle, crank operator, or gearbox
Espagnolette rods or multipoint locking mechanism
Mushroom cams, rollers, tongues, or shoot bolts
Frame-mounted keeps
Opening restrictor or limit arm
Sash support components
Compatible fasteners
Gaskets and drainage clearances
For friction stays, record the stack height, stay length, sash width, sash height, sash weight, opening angle, and top-hung or side-hung orientation. “300 mm hinge” is not enough.
For multipoint casement hardware, inspect compression around the full perimeter. One excessively tight keeper can increase handle force and distort the sash while another corner remains loose.
Horizontal Sliding Windows
A sliding window generally needs fewer visible components, but every component depends on sash overlap and alignment.
Check:
Rollers, glides, or low-friction bearing surfaces
Sash pull or integral handle
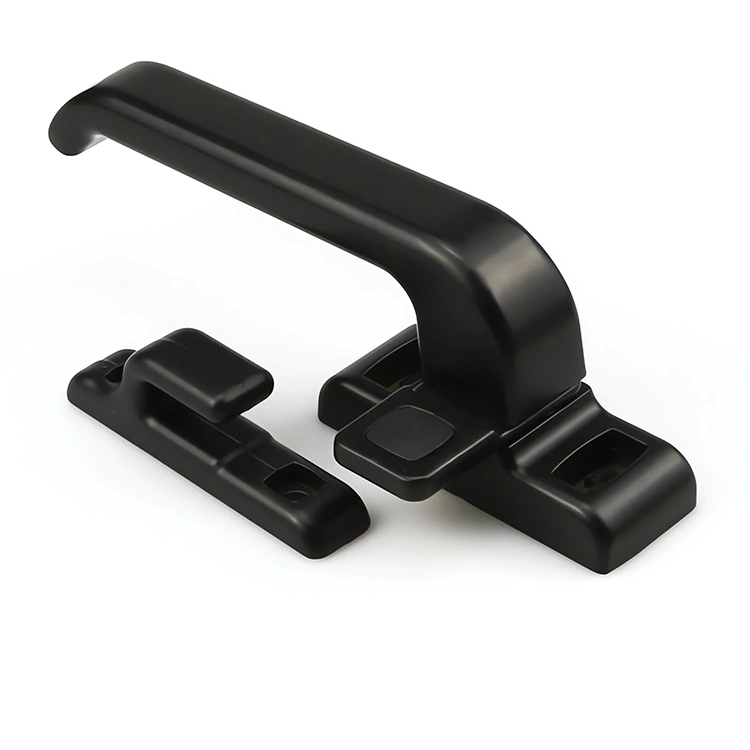
Crescent lock, cam latch, spring latch, or keyed lock
Keeper position and fixing strength
Anti-lift block
Vent stop or opening limiter
Interlock engagement
Drainage and weep clearance
Removable sash-release method
A crescent lock does not pull every sash equally. Cam offset, keeper height, sash overlap, and mounting stiffness determine how much closing pressure reaches the meeting rail.
And no, a keyed lock is not automatically safer. A keyed device can create an egress problem when occupants cannot release it quickly or when the key is missing.
Single-Hung and Double-Hung Windows
Hung windows depend on a balance system. Ignore the balance rating and the rest of the hardware schedule becomes irrelevant.
Include:
Spiral, block-and-tackle, constant-force, or other sash balances
Balance shoes and pivot bars
Sash locks at the meeting rail
Sash lifts
Tilt latches where the sash tilts for cleaning
Travel stops or opening control devices
Anti-drift or anti-drop features
Replacement access for balances
Record the sash weight, channel dimensions, travel length, mounting position, and balance identification. Do not order replacement balances from the window height alone.
FGIA identifies AAMA 902-24 for sash balances and AAMA 950-25 for window opening control devices. These are the kinds of specific references that belong in a serious window hardware checklist.
Tilt-Turn Windows
Tilt-turn hardware is a linked system. Mixing components from different systems is asking for sequencing faults.
The set commonly includes:
Handle
Central gearbox
Espagnolette strip
Corner drives
Top stay or scissor arm
Bottom hinge and corner bearing
Frame strikers
Security cams
Anti-mishandling device
Sash-lift or run-up block
Opening restrictor
Verify sash rebate dimensions, hardware groove, sash weight, height-to-width ratio, hinge capacity, handle height, striker positions, gasket compression, and the exact component family.
One mismatched corner drive can stop the entire sequence.
Egress and Child-Risk Windows
This is where generic lock advice becomes dangerous.
The U.S. Consumer Product Safety Commission reported that an estimated 5,600 children aged 12 and under received emergency-department treatment after window falls in 2024. About one-third required hospitalization, and CPSC recorded at least 25 deaths among children 12 and under from 2021 through 2023.
The agency’s 2026 window-safety guidance recommends guards, stops limiting openings to no more than 4 inches, top-opening windows where possible, and hardware that adults and older children can release for emergency escape on lower floors. Screens are not fall protection.
That creates a real design tension: limit a child’s fall exposure without trapping an occupant during a fire.
The checklist must therefore record:
Whether the opening is part of a required escape route
Required clear-opening dimensions
Release method and number of operating actions
Whether a key, tool, or special knowledge is needed
Guard or restrictor release capability
Maximum permitted opening
User age and occupancy type
Local code and product-standard requirements
Do not resolve that tension with a random keyed latch.
The Evidence That Should Change Your Hardware Schedule
Accessibility Is a Hardware Requirement
The U.S. Access Board’s ADA Standards state that door and gate handles, pulls, latches, locks, and other operable parts generally must be mounted between 34 inches and 48 inches above the finished floor. Operable parts must work with one hand without tight grasping, pinching, or wrist twisting, with a maximum activation force of 5 pounds under Section 309.4.
That means accessibility is not satisfied by writing “lever handle” in the schedule.
Check the grip shape. Check the return spring. Check the latch retraction force. Check whether the lever collides with the frame or pulls the user’s knuckles into the jamb.
And test the assembled door, not the loose handle.
Sealing Performance Has an Energy Consequence
The U.S. Department of Energy states that heat gain and heat loss through windows account for 25% to 30% of residential heating and cooling energy use.
Hardware alone does not create an energy-efficient window. But weak keepers, worn rollers, poor hinge positioning, insufficient multipoint compression, and distorted sash geometry can undermine the seals of an otherwise high-performance unit.
This is why I reject the idea that locks are merely security products. On operable windows and doors, they also influence compression, air leakage, water resistance, noise, and user force.
Standards Must Match the Component
The 2026 edition of the North American Fenestration Standard, AAMA/WDMA/CSA 101/I.S.2/A440, was published in June 2026. FGIA also lists hardware-specific documents including AAMA 901-24 for window operators, AAMA 902-24 for balances, AAMA 904-21 for multi-bar hinges, AAMA 906-21 for sliding-door rollers, AAMA 907-23 for corrosion-resistant coatings, AAMA 909-13 for exterior-door multipoint locks, and AAMA 950-25 for window opening control devices.
This matters because “tested hardware” is meaningless without the test name, edition, specimen configuration, result, laboratory, and relationship between the tested sample and the product being purchased.
A zinc-plated lockcase tested for corrosion is not proof that a powder-coated handle, stainless fastener, aluminum plate, nylon guide, and carbon-steel spring will survive the same environment as an assembled system.
Turning the Checklist Into a Purchasable Hardware Schedule
A good door and window hardware schedule must be clear enough for engineering, purchasing, production, installation, inspection, and future replacement.
1. Give Every Opening a Unique Number
Do not schedule “all exterior doors” as one line unless they are genuinely identical.
Use opening numbers such as:
D-101: Main entrance, active leaf
D-102A: Service door, left-hand reverse
SD-201: Two-panel sliding patio door
W-301: Side-hung casement window
W-302: Bedroom egress window
The number should connect the architectural drawing, profile drawing, bill of materials, hardware set, finish, and inspection record.
2. Assign a Complete Hardware Set
Create set identifiers such as HW-01, HW-02, or WH-03.
A set should include every component needed for the opening to work. Do not leave keepers, fasteners, spindle lengths, cylinders, brackets, corner drives, or covers hidden under “by others.”
That phrase causes expensive arguments.
3. Record Compatibility Dimensions
At minimum, record dimensions relevant to the mechanism:
Backset
PZ or handle-to-cylinder centres
Faceplate width and thickness
Spindle size and projection
Fixing centres
Keeper position
Hinge stack height
Roller diameter and adjustment
Hardware-groove dimensions
Sash or panel weight
Handing
Opening direction
Frame and sash material
For load-bearing products, compare the application against the available commercial door hinges rather than selecting a hinge solely by leaf length and finish.
4. Define Performance, Not Adjectives
Replace “premium,” “strong,” “weatherproof,” and “high security” with measurable requirements.
Ask for:
Cycle-test standard and achieved cycles
Corrosion-test method, duration, substrate, and acceptance criteria
Static-load or vertical-load evidence
Operating-force measurements
Water, air, and structural test relationship
Coating thickness and process
Material grade
Traceability method
Inspection sample size
Approved golden sample
“Passed salt spray” tells me almost nothing without the test conditions and failure criteria.
5. Approve the Assembly Before Mass Production
A golden sample should include the real handle, spindle, lockcase, keepers, hinges, fasteners, finish, and profile section.
Test:
Full lock and release sequence
Handle return
Latch engagement
Keeper alignment
Gasket compression
Operating force
Closing and opening under minor misalignment
Fastener access
Cylinder function
Finish consistency
Packaging protection
Pretty samples lie.
The production assembly is what matters.
6. Preserve Replacement Data
A hardware schedule is also a future maintenance document.
Record supplier codes, revision numbers, drawings, finish references, approved substitutes, tooling ownership, packaging configuration, batch identification, and replacement measurements. A maintenance team should not need to reverse-engineer a failed lock from three photographs ten years later.
Specification Traps I Would Reject
Selecting Hardware Before the Profile Is Frozen
The profile controls mounting space, screw engagement, spindle length, keeper depth, lockcase width, drainage, and reinforcement.
Approve the hardware too early and the extrusion gets modified around it. Approve it too late and the hardware gets forced into a space it was never designed to occupy.
Either way, someone pays.
Treating Finish as a Color Code
“Matte black” is an appearance, not a process.
The schedule should identify the substrate, pretreatment, coating system, gloss range, texture, film thickness, acceptable color variation, corrosion requirement, and exposure class. Coastal chloride, swimming-pool chemicals, alkaline cleaners, construction dust, and packaging abrasion attack finishes differently.
Using One Hardware Set Across Different Openings
Standardization reduces inventory only when the openings are mechanically compatible.
Using the same lever on interior doors, exterior entrance doors, sliding panels, and tilt-turn windows may simplify a presentation. It does not simplify torque, spindle, spring, sealing, security, or installation requirements.
Standardize interfaces where possible. Do not standardize away the physics.
Ignoring Handing and Operating Sequence
Handing errors are still common because teams use different conventions.
Do not write only “LH” or “RH.” Add a diagram showing the secure side, hinge side, swing direction, handle position, active leaf, and viewing direction.
For sliding and folding systems, document which panel moves first and where each lock engages.
Buying the Cheapest Component in Every Category
A low-cost hinge, lockcase, handle, keeper, and roller can become a very expensive opening.
The components interact. A flexible handle plate can loosen the spindle. A weak return spring can leave the latch partially retracted. A thin keeper can deform. A low-capacity roller can drop the panel and overload the lock.
The lowest component prices do not necessarily produce the lowest installed cost.
FAQs
What hardware is required for a hinged exterior door?
A hinged exterior door hardware set is the coordinated group of hinges, handles, latch or multipoint lock, cylinder, keepers, threshold, seals, closer or stop, and fasteners selected to support the door’s weight, resist weather and forced entry, maintain compression, and remain operable under the project’s accessibility and egress requirements.
The exact set depends on the door material, dimensions, weight, traffic, handing, exposure, security function, frame reinforcement, and whether the opening is fire-rated or part of a required exit route.
What is a door and window hardware schedule?
A door and window hardware schedule is a controlled table that assigns a complete, compatible hardware set to each opening number, recording opening type, material, handing, dimensions, finish, operation, security, accessibility, exposure, performance standard, supplier code, and approval status so procurement and installation teams work from one source of truth.
The schedule should connect directly to profile drawings, product drawings, opening elevations, test reports, sample approvals, and bill-of-material records.
What is the best hardware for different door and window types?
The best hardware for different door and window types is the hardware package that matches the opening’s movement, load, profile geometry, exposure, sealing need, user group, security level, and code role, rather than the package with the highest part count, strongest marketing claim, or most expensive finish.
Hinged doors need load control and alignment. Sliding openings need roller and keeper coordination. Casement windows need hinge, operator, and compression control. Egress windows need fast, understandable release.
How do you select door and window hardware?
To select door and window hardware, classify the opening first, then verify weight, dimensions, handing, frame material, mounting space, operation, traffic, weather exposure, security, accessibility, egress, corrosion class, cycle target, and finish before matching handles, hinges, locks, latches, operators, rollers, restrictors, and fasteners as one tested assembly.
After selection, validate the complete set on the real profile or a representative mock-up. Never rely only on separate component samples.
What belongs on a commercial door hardware checklist?
A commercial door hardware checklist is a project-control document covering the complete opening assembly, including hinges or pivots, lockset or exit device, cylinder, closer, stops, protection plates, seals, threshold, electrified components, signage, fasteners, keying, accessibility, fire or egress status, finish, testing evidence, and coordination with the door and frame preparation.
It should also identify power supplies, wiring responsibility, access-control logic, emergency operation, approved substitutions, installation instructions, and final inspection criteria.
Build the Schedule Around the Opening
A reliable door hardware checklist does not begin with a handle. A reliable window hardware checklist does not begin with a latch.
Both begin with the opening.
Define how it moves, how much it weighs, who operates it, what it must resist, how it must seal, how people escape through it, and how technicians will replace its components years later. Then select the hardware set.
That approach is less glamorous than choosing finishes from a sample board.