Procura soluções de hardware que cumpram as normas europeias e americanas?
Utilize este modal de inquérito guiado para passar de um formulário de orçamento genérico para uma conversa técnica mais clara. Os compradores podem escolher se precisam de preços, ficheiros CAD / 3D ou suporte OEM / ODM antes de partilharem os detalhes de contacto.
Conceção que privilegia a compatibilidade entre sistemas de portas e janelas
Produção repetível com pontos de controlo de inspeção claros
Documentação e controlo de alterações para programas de longa duração
Suporte de engenharia reativo para feedback de ajuste e de campo
Amostragem: protótipos + validação da instalação + controlos funcionais
Falar com o nosso chefe
No. 8 South Sanjian Development Zone, Bajia, Jinsha, Danzao Town, Nanhai District, Foshan, Guangdong, China
A recessed sliding handle is only as good as the opening it sits in. The handle drawing defines the visible shape, but the panel cutout decides whether the body seats flush, whether the fixings bite into sound material, and whether a hand can get behind the pull at all. There is no universal depth or corner radius for these cutouts. The right values come from the handle’s rear geometry, the panel’s wall construction and the way the opening is machined. This guide explains how pocket depth, corner radius and fixing details interact, which dimensions belong on an OEM drawing, and what buyers should confirm with a supplier before sampling a recessed pull for sliding doors or windows.
What Does a Recessed Sliding Handle Cutout Need to Define?
A complete cutout specification defines six things: the opening length and width, the pocket depth, the inside corner radius, the distance from the opening to the panel edge, the fixing positions, and the tolerance on each of these, all measured against a stated panel thickness. Leaving any one open usually shows up as a handle that rocks, protrudes, binds against a neighbouring panel, or cannot be fixed securely.
It helps to separate three zones that buyers often treat as one:
The visible opening and flange seat. This is what the user sees. The outer flange or lip normally covers the cut edge, so it hides small mismatches in the opening, but only up to a point.
The pocket the body occupies. This is where depth and corner radius matter, because the rear body must physically enter it.
The material left behind. This is the panel wall, profile chamber or reinforcement that retains the screws, bosses or side channels.
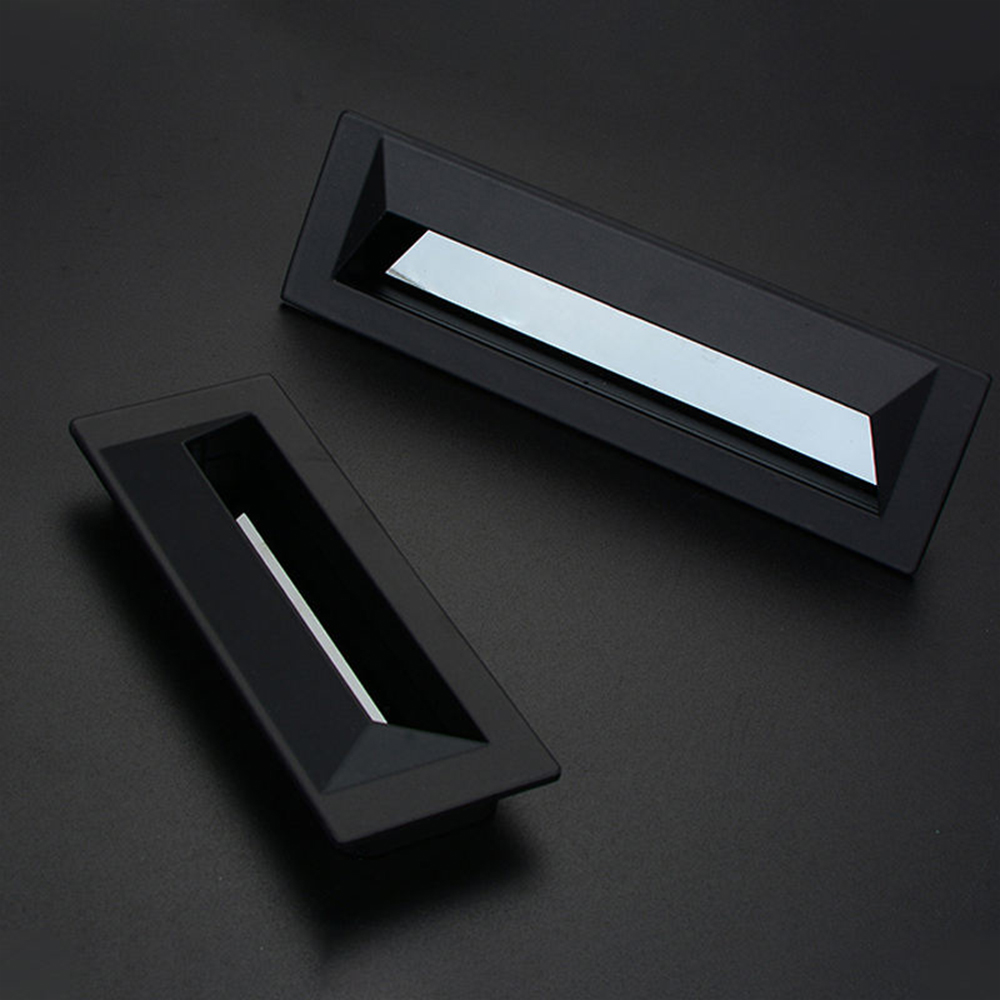
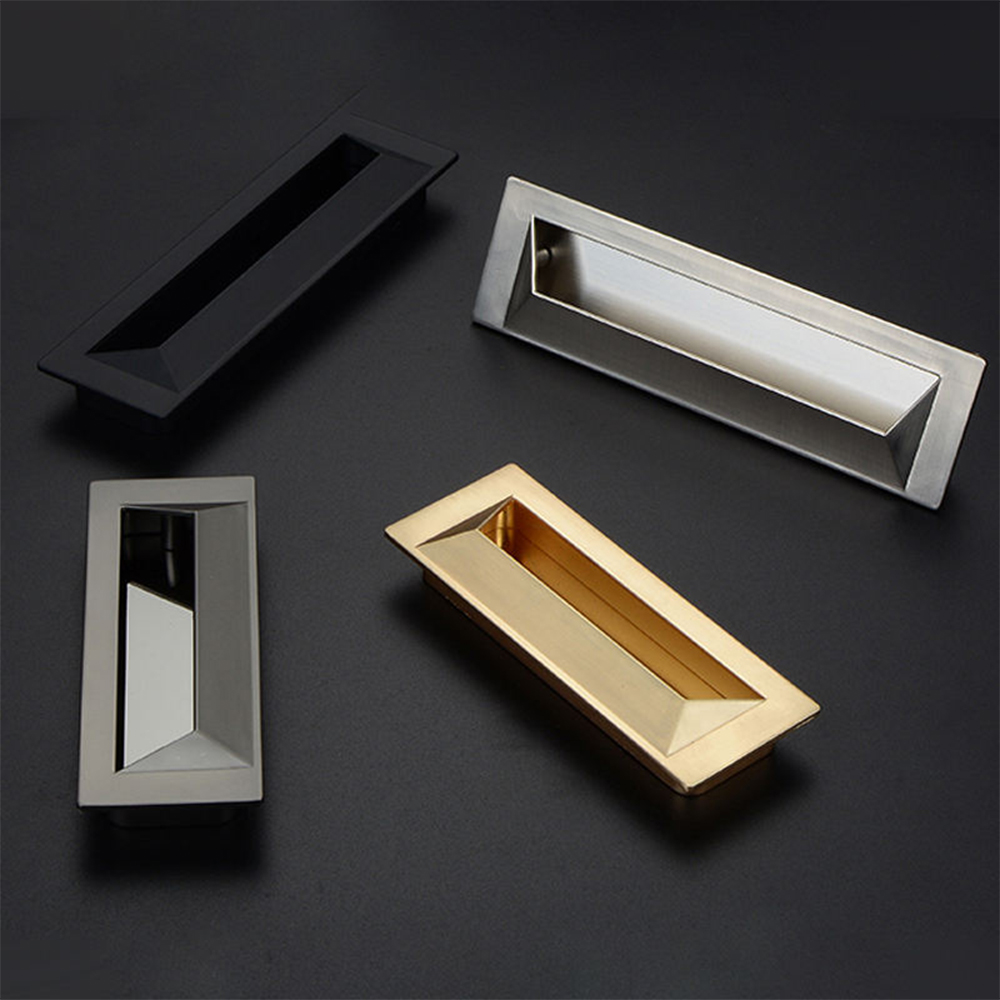
CHIER’s own recessed pull pages point to the same checklist. The recessed edge-pull handle with a ribbed side profile, for example, asks buyers to confirm cutout dimensions, insertion depth, panel thickness, edge clearance and how the side channels engage with the receiving profile. That last item is a reminder that on some designs the fixing is partly a profile-geometry question, not just a screw-hole question.
How Deep Should the Cutout Be?
The cutout should be deep enough to take the handle’s full insertion depth, and no deeper than the panel can afford while still retaining the fixings and keeping the opposite face sound. The handle’s own drawing sets the lower limit. The panel construction sets the upper one.
“Depth” is used for three different measurements, and mixing them up causes most specification errors:
Insertion depth. How far the rear body projects below the flange. The cutout must accept this plus any clearance the drawing specifies.
Finger depth. How much usable space the hand has inside the pocket. This is a handle design feature, not a cutout feature, but the cutout can limit it if the opening is narrower than the pocket requires.
Residual material. What remains behind the cutout, including the opposite panel face, any chamber wall and the thread-bearing material.
Handle-specific limits matter more than generic rules. Rustica’s installation guidance for a wood barn-door flush pull, for example, recommends a recess no deeper than 3/8 inch for that particular pull, and it states that those dimensions belong to that pull and that buyers should check the current instructions for their model. That is the right way to read any published number: as a figure for one product in one panel type, not a transferable standard.
Why a deeper recess is not automatically a better grip
A recessed pull reduces projection by moving the grip into the panel. The cost is hand space. The U.S. Access Board recommends 1½ inches of knuckle clearance for bars, pulls and similar hardware to facilitate gripping. A recessed pocket usually cannot offer that kind of gap, which is the core trade-off of the format. Gaining more finger depth means a larger cutout, a thicker panel section or a longer pocket, each of which has structural or cosmetic consequences.
Where a project falls under accessibility rules, the same Access Board guidance states that door hardware must be operable with one hand, must not require tight grasping, pinching or wrist twisting, and must operate with no more than 5 lbf. Those provisions apply to covered buildings and not to every residential sliding door, so confirm the target market’s requirements before claiming a finger pull is suitable. For the wider question of how much a handle can stand proud near frames, screens and neighbouring panels, see this guide to handle projection and clearance near frames, screens and adjacent panels.
Cutout Corner Radius: Why Inside Corners Are Never Sharp
An inside corner on a machined cutout always has a radius, because the cutting tool is round. As Hubs’ CNC design guidance puts it, the geometry of the tool transfers to the part, so internal corners carry a radius however small the tool. The same guidance recommends an internal vertical corner radius of at least one third of the cavity depth, and suggests going slightly above the tool radius so the cutter follows a circular path rather than turning a 90° corner. If a sharp corner is functionally required, it suggests a T-bone undercut rather than a smaller radius.
That guidance is written for CNC-milled pockets. A hand-routed timber panel, a punched or laser-cut sheet component and a milled aluminium profile each have different practical limits, so ask the panel fabricator which process will make the cutout before fixing the radius on the drawing.
The two radii that must agree
Buyers usually think of one corner radius. There are two:
The cutout’s inside corner radius, set by the cutter or tooling.
The handle body’s outer corner radius, set by the handle drawing or mould.
If the cutout radius is larger than the body’s corner radius, the body corner collides with the pocket wall and the handle cannot seat flush. If it is much smaller, there may be a visible gap at each corner that the flange has to hide. The safe rule is that the cutout radius should not exceed the body radius, and the flange should overlap the cut edge with margin to spare.
This matters differently across designs. A handle with a rounded closed end and a squared opposite end gives you two different corner conditions in one opening. A design with squared ends is more demanding, because tight corners push the cutter size down, and a smaller cutter is less rigid and generally cuts more slowly. That is a cost question as much as a fit question, so raise it at the quotation stage instead of at the first article.
Outer edge radius is a separate issue. Sharp rear or flange edges can injure users and installers, and a clean radius on exposed edges is a safety and comfort feature, not decoration.
Fixing Details: What Actually Holds a Recessed Handle in Place
A recessed handle is retained by some combination of screws, mounting bosses, side channels or clips, and the panel material behind them. The best fixing arrangement depends on the handle type, so the first question for a supplier is how this specific design is retained.
Handle design
Operating style
What the cutout must accommodate
Fixing and clearance points to verify
Ribbed side-profile edge pull
Fixed finger pocket, pulled directly
Long rectangular pocket with a rounded closed end, raised perimeter lip
How the side channels engage the receiving profile; edge clearance; flange seating
Stitched side-grip insert pull
Fixed finger pocket with textured side insert
Elongated pocket with straight edges and squared ends
Whether the surrounding profile supports the recessed body; insert orientation; access in the fully closed position
Fold-out pull with curved end caps
Pivoting grip bar stored in a central channel
Full recess length and width, not just the visible face
Mounting-boss positions; grip-bar clearance folded and open; interference with adjacent panels
The rows summarise the points CHIER’s product pages ask buyers to confirm. They are review prompts, not published tolerances.
O recessed pull handle with a stitched side grip insert e o fold-out recessed sliding handle with curved end caps illustrate how different the cutout brief becomes. The fold-out type has moving parts and boss positions, so the cutout drawing has to carry fixing coordinates and an open-position clearance envelope. The stitched design is a fixed pocket, but the insert is positioned along one side, so handing and orientation have to be right.
Edge distance and wall support
Keep fixing points and the opening away from the panel edge by a margin set by the profile or panel supplier, not by guesswork. In thin-walled profiles the limiting factor is usually not the screw but the material around it. A screw that engages only a few threads in a thin wall may pass an inspection and still fail in service. If the profile cannot take the load, options include a backing plate, a rivet nut, an insert or a revised fixing position. A longer screw is not a safe substitute, because it may break through the opposite face or foul the profile chamber.
Pull loads are off-axis
Users do not pull a recessed handle along a neat line. They hook fingers, jerk a sticking panel and sometimes twist. A drawing should therefore state the screw type and length, minimum thread engagement, maximum installation torque, acceptable panel thickness range and fixing-centre tolerance, and the supplier should say what pull test, if any, was used. If a sliding door is already stiff because of worn rollers or a contaminated track, no cutout detail will fix that. CHIER’s article on loose fixings, poor grip and panel interference covers how these failures present in the field.
A Defensible Position: Smaller Cutouts and Lower Projection Are Not Always Better
The usual brief is to minimise projection and keep the cutout small. That works when the panel is thick enough, the user needs only a light pull and the clearance behind the handle is genuinely tight. It fails when a heavy panel needs a firm grip, because a shallow pocket forces fingertip pulling, which raises peak force and concentrates load on the edge of the opening.
The opposite error is just as common: enlarging the pocket to improve grip without checking what remains of the panel. Deeper or longer cutouts reduce the material available for fixings and can weaken a thin skin. The decision rests on three conditions: panel thickness and construction, the pull force the door actually requires, and the clearance that the surrounding frame, screen or adjacent panel leaves. When those conditions differ from the handle’s reference application, the standard cutout may no longer be the right one.
How to Verify Fit Before Production
Dimensions that pass individually can still fail as an assembly. The handle, the cutout, the fixing holes and the panel profile each carry their own tolerance, and those tolerances stack. Verify the cutout in three ways:
Fit the handle on the actual panel or profile, or on a fixture with the same interfaces, not on a flat board.
Check nominal, low-limit and high-limit conditions where the supplier can supply or simulate parts at the extremes.
Record the actual measuring method for the cutout and fixing centres, because a tolerance is meaningless without a defined datum and instrument.
Reject any sample that needs filing, forcing or bending to seat. CHIER’s guide to approving a custom sliding handle from drawing to production sample sets out the sample stages and the approval record in detail. The main practical point is that an appearance prototype does not prove that the cutout will work in production, and the approved drawing revision should be written on the record.
What Should Buyers Specify Before Requesting a Quote?
A quotation for a recessed sliding handle is only as accurate as the cutout information behind it. Send these items together:
Panel or profile drawing with a dimensioned cross-section, including wall thicknesses and any chambers behind the cutout.
Panel thickness and material, such as aluminium, PVC, timber or steel, since this governs fixing method and cutout process.
Cutout length, width, depth and corner radius, plus the process (CNC, router, punch or laser) that will create them.
Edge distances and fixing coordinates, with screw type and the access side.
Existing sample or rear-side measurements, if the handle replaces an existing part.
Installation photos showing neighbouring panels, frames or screens, and the operating direction.
Finish, colour arrangement, order quantity and packaging requirements.
Mercado-alvo, in case accessibility or product-safety requirements apply.
Buyers comparing options can review the three recessed designs above before sending an enquiry. A listed handle should not be assumed to fit a different profile until the section drawing has been reviewed.
Perguntas mais frequentes
How deep should a recessed sliding handle cutout be?
Deep enough to accept the handle’s full insertion depth plus specified clearance, and no deeper than the panel can afford while still retaining the fixings. There is no universal figure. The handle drawing and the panel construction set the range, and published depths apply only to the specific product.
What corner radius should a handle cutout have?
For CNC-milled cutouts, Hubs recommends an inside corner radius of at least one third of the cavity depth. The cutout radius should not exceed the handle body’s corner radius, or the body will not seat flush. Confirm the process with the panel fabricator.
Why can’t a cutout have sharp inside corners?
Cutting tools are round, so a machined inside corner always carries the tool’s radius. If a sharp corner is truly needed, a T-bone undercut can allow the handle to seat. Otherwise, the handle design must tolerate a corner radius.
What fixing details should be on the drawing?
State the screw type and length, minimum thread engagement, installation torque, fixing-centre tolerance, edge distance, acceptable panel thickness range and any backing plate or insert. For channel-engaged or boss-mounted designs, add the receiving profile geometry or boss coordinates.
Does a recessed handle meet accessibility requirements?
Not automatically. In covered buildings, ADA door hardware must work with one hand, without tight grasping, pinching or wrist twisting, and with no more than 5 lbf. Many sliding doors are outside that scope, so check the applicable rules for the target market.
Can I use a longer screw if the handle is loose?
Usually not. A longer screw may break through the opposite face or foul a profile chamber. If the wall is too thin to hold the thread, a backing plate, insert, rivet nut or revised fixing position is generally the safer repair.