Looking for hardware solutions that meet European / American standards?
Use this guided inquiry modal to move from a generic quote form to a clearer technical conversation. Buyers can choose whether they need pricing, CAD / 3D files, or OEM / ODM support before sharing contact details.
Compatibility-first design across door / window systems
Repeatable production with clear inspection checkpoints
Documentation and change control for long-running programs
Responsive engineering support for fit and field feedback
Yet when designers reduce this decision to appearance, they ignore preload, thread engagement, tamper resistance, galvanic compatibility, installer access, profile thickness, cover retention, and the uncomfortable fact that decorative trim can hide a weak joint just as easily as it hides a well-engineered one.
So which system actually deserves the specification?
My answer is blunt: neither concealed fasteners nor exposed screw fasteners are inherently superior. The better system is the one that remains tight, operable, corrosion-resistant, inspectable, and replaceable throughout the intended service life of the door or window.
That sounds obvious. It rarely appears in the drawing.
The Screw Head Is Not the Joint
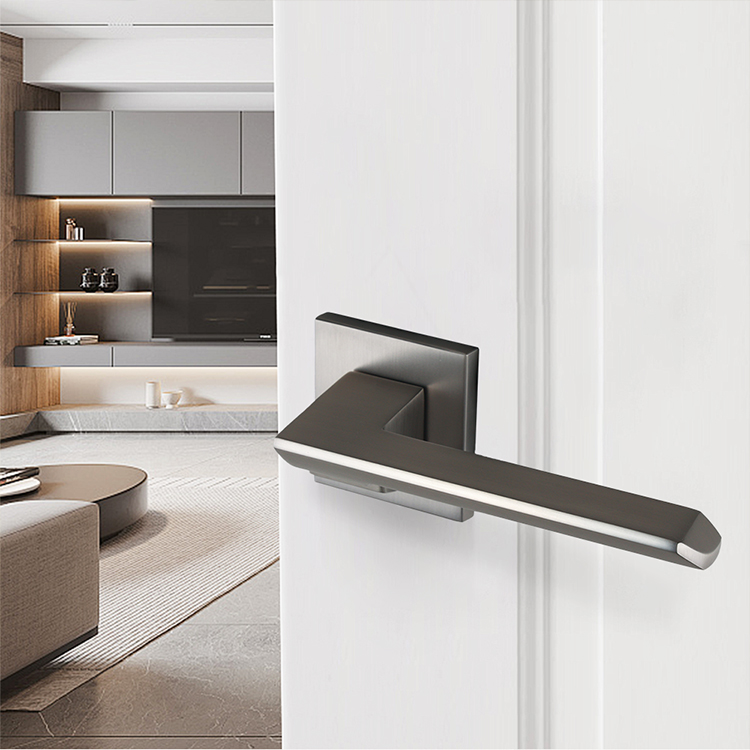
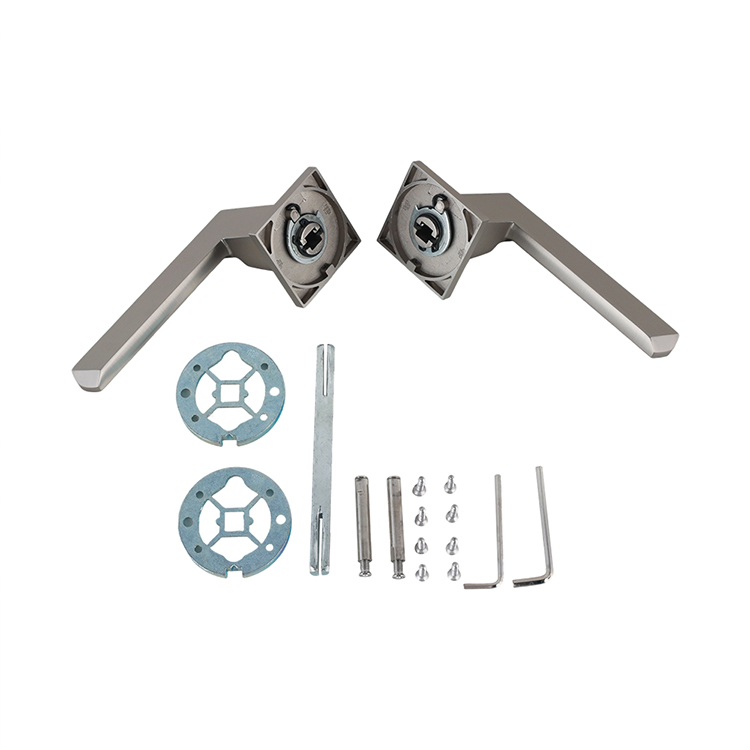
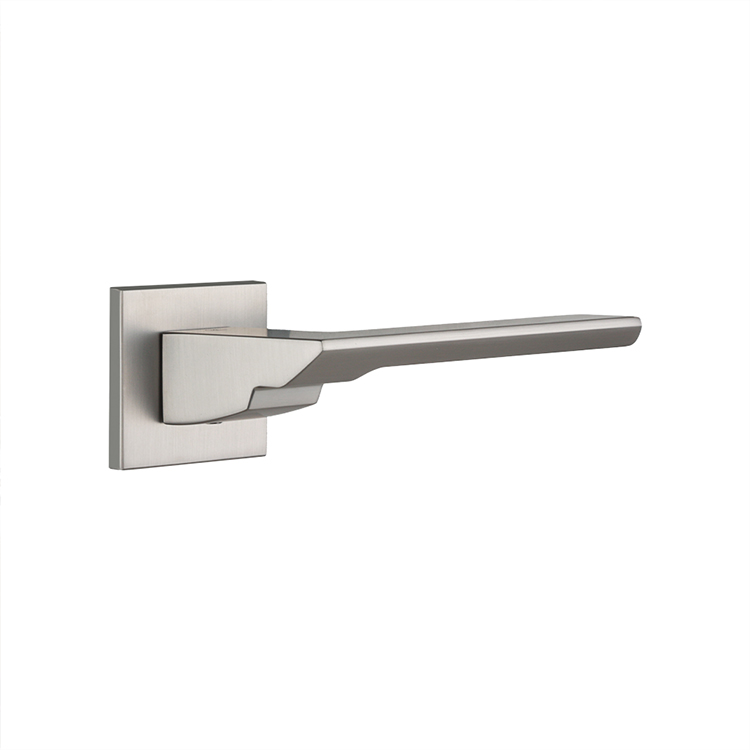
A concealed fastener system typically places its fixing screws, through-bolts, inserts, or mounting plate behind a rose, escutcheon, snap-on cover, sliding trim plate, or removable backplate. Once assembled, the user sees the handle body and trim rather than the fixing heads.
An exposed screw system leaves one or more screw heads visible on the handle rose, mounting plate, pull-handle foot, window-handle base, or escutcheon.
That is the visual difference. It is not the engineering difference.
The joint’s actual performance depends on:
Fastener diameter and material
Thread form and engagement depth
Screw spacing and load direction
Substrate thickness
Boss, insert, nut, or reinforcement geometry
Clamp load and tightening control
Vibration and operating cycles
Corrosion between dissimilar metals
Installer access and tool alignment
The strength of the handle base beneath the decorative cover
The NASA Fastener Design Manual makes the broader engineering point clearly: fastener selection requires consideration of corrosion, vibration, fatigue, initial preload, coatings, locking methods, torque, tapped-hole pullout, and combined loading. Screw visibility does not appear on that list because visibility is not what carries the load.
Here is the hard truth: when a drawing says only “concealed screws,” it does not contain a fastening specification. It contains a styling instruction.
Table of Contents
Concealed Fasteners vs Exposed Screws: The Real Comparison
Design Factor
Concealed Fasteners
Exposed Screws
My Verdict
Appearance
Clean, uninterrupted rose or backplate
Screw heads become part of the visible design
Concealed usually wins for premium interiors
Structural strength
Depends on the hidden joint, not the cover
Depends on the visible joint, not the head style
Neither wins automatically
Tamper resistance
Better when access requires removing secured trim
Common-drive heads may be quickly removable
Concealed often wins, but only with controlled cover removal
Installation speed
More components and assembly steps may be required
Direct access generally simplifies tightening
Exposed often wins
Inspection
Loose screws may remain hidden until movement appears
Screw condition can be checked immediately
Exposed wins
Field repair
Cover removal may require special tools or instructions
Standard tools usually provide direct access
Exposed wins
Cleaning
Smooth surfaces collect less dirt around screw recesses
Recessed heads can trap moisture and cleaning residue
Concealed usually wins
Corrosion visibility
Early corrosion may remain hidden
Staining and coating failure appear sooner
Exposed is easier to monitor
Manufacturing complexity
Cover tolerances, retention clips, detents, and finish matching add variables
Fewer cosmetic components may be needed
Exposed is simpler
Security applications
Can prevent casual access to fixings
Requires protected placement or security-drive heads
Concealed or tamper-resistant exposed fixings
Replacement projects
Cover may hide old holes and surface marks
Existing holes must align cleanly
Concealed often wins
Maintenance-heavy sites
Hidden access slows technicians
Visible fixings reduce service time
Exposed often wins
The table exposes the trade-off that marketing brochures avoid: concealed fixing door handles optimize the visible surface, while exposed screw systems often optimize access.
Those are different objectives.
Where Concealed Fasteners Earn Their Keep
Premium residential, hotel, and retail projects
Concealed fasteners make sense where the handle is part of a controlled architectural finish. A clean rectangular backplate, low-profile circular rose, or slim window-handle base looks more intentional when Phillips, Pozidriv, Torx, or hex heads are not interrupting the surface.
This is one reason concealed mounting appears frequently in modern minimalist hardware. The broader shift toward slimmer profiles and visually quieter hardware is explored in this guide to modern door and window handle design.
But clean styling has a price. The supplier must control:
The gap between the cover and base
Cover flatness
Snap-tab or clip retention
Paint and plating thickness
Removal force
Rattle after repeated operation
Tool access beneath the cover
Scratching during installation and servicing
A cover that sits 0.5 mm proud on one side can make a technically functional handle look defective. A clip that is too weak rattles. A clip that is too aggressive damages the coating during service.
Minimalism is unforgiving.
Public-facing and hygiene-sensitive surfaces
A smooth trim surface is easier to wipe than a faceplate interrupted by countersunk screw heads. That advantage matters in hotels, clinics, schools, food-service spaces, and high-touch commercial environments.
Still, I would not approve a concealed design merely because it is easier to clean. The cover must not become a moisture trap. Water, chloride residue, disinfectant, or condensation entering behind the rose can remain unseen while attacking carbon-steel screws or an aluminum mounting boss.
Hidden corrosion is still corrosion.
Security and casual tampering
Concealed fasteners can slow casual removal because the attacker must first understand and defeat the cover-retention method. That is useful in public washrooms, schools, shared residential buildings, transport facilities, and other uncontrolled locations.
But concealed does not mean tamper-proof.
A snap cover that can be removed with a coin or flat screwdriver offers little protection. For security-sensitive applications, I would evaluate the entire removal sequence:
Can the trim be reached from the unsecured side?
Can it be removed with a common tool?
Does removing it expose through-bolts or only decorative screws?
Can the handle still operate after one fixing loosens?
Is a Torx security, pin-hex, one-way, or proprietary drive justified?
Can authorized maintenance staff still service it without destroying the finish?
Security theatre is expensive. Real security is designed into the load path.
When Exposed Screws Are the Smarter Decision
Industrial and maintenance-heavy openings
Exposed screws are often the honest choice for warehouses, workshops, machinery enclosures, utility rooms, agricultural buildings, service doors, and other applications where maintenance speed matters more than visual silence.
A technician can see whether the screw is loose, corroding, stripped, missing, or installed at an angle. A torque stripe can be inspected. Replacement does not begin with prying off a painted cover.
Ugly? Sometimes.
Useful? Absolutely.
I would rather specify two correctly positioned exposed M5 fasteners with controlled engagement and proper reinforcement than approve a beautiful concealed rose held to a thin aluminum wall by poorly formed M4 threads.
Cost-controlled hardware programs
Hidden screw door handles normally require more than hidden screws. They may also require a separate cover, cover tooling, retention clips, extra assembly labor, finish matching, protective packing, and removal instructions.
Each addition creates another production variable.
Exposed screw designs can reduce part count and simplify:
Tooling
Assembly
In-process inspection
Packaging
Replacement-part stocking
Installer training
Field servicing
That does not make them “cheap.” It makes them direct.
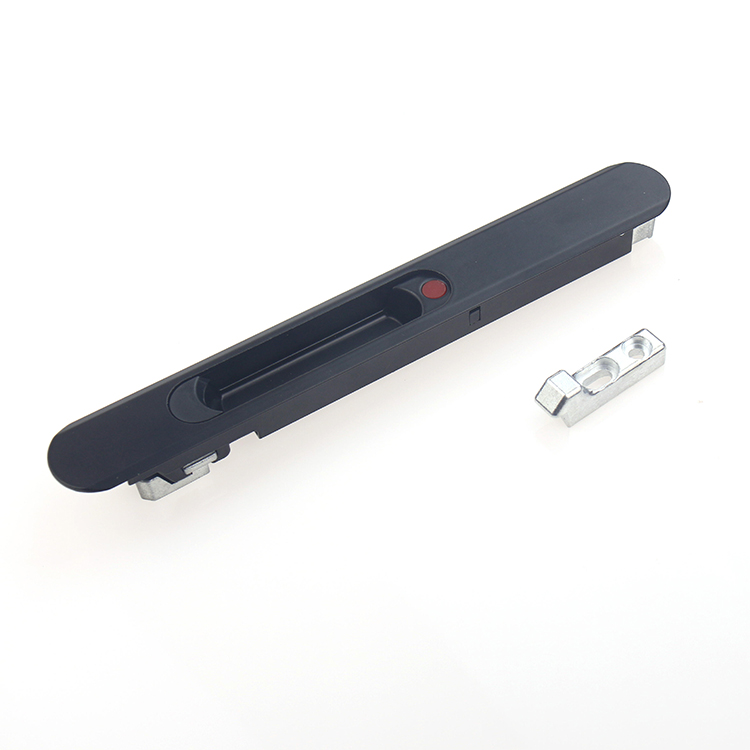
For manufacturers comparing complete handle families rather than isolated samples, the door and window handle product range provides useful reference points across casement, sliding, lift-slide, lever, locking, and flush-handle applications.
Products that require regular adjustment
Some door handle mounting systems need periodic access because the handle interfaces with a spindle, gearbox, spring cassette, lock body, or adjustable linkage.
Hiding the screws behind trim creates friction every time the system must be adjusted. Worse, repeated cover removal can chip powder coating, bend clips, loosen snap features, or leave pry marks.
And this is where design teams lie to themselves: they call a component “non-serviceable” when they really mean “inconvenient to service.”
The Fastening Details That Actually Decide Performance
Fixing centres and load direction
Fixing centres determine how operating loads are distributed through the base. Wider spacing can improve resistance to rotation, but only when the substrate and handle geometry support it.
The load is rarely a clean axial pull. Users push down, pull sideways, twist the lever, hang objects from it, slam the door while holding it, and use the handle to overcome gasket compression or poor alignment.
An M5 screw entering a steel nut is not the same joint as an M5 screw entering a thin aluminum extrusion, die-cast zinc boss, polymer insert, rivet nut, or tapped stainless plate.
Do not specify a universal thread-engagement rule and pretend the materials are interchangeable.
For a thin aluminum profile, the design may need:
A rivet nut
Clinch nut
Threaded insert
Tapped reinforcement plate
Through-bolt and nut
Bridge plate spanning the profile cavity
Dedicated extruded screw boss
The receiving component can fail before the screw does. Threads strip. Bosses crack. Thin walls deform. Painted surfaces settle under clamp load.
And if the screw is concealed, the customer may not see the problem until the handle moves.
Preload, torque, and locking method
Fastener torque is a production variable, not a decorative note.
The same nominal screw can generate different clamp loads depending on coating, lubrication, thread condition, driver speed, under-head friction, receiving material, and whether threadlocker is present. This is why I reject a drawing that gives a torque value without identifying the screw finish and mating material.
The specification should state:
Fastener designation
Property class or material grade
Coating
Lubricated or dry condition
Tightening method
Validated torque range
Threadlocker or mechanical locking requirement
Reuse policy
Inspection method
Re-tightening rule, when permitted
A snap-on cover does not compensate for uncontrolled preload.
Corrosion Can Make Either Design Fail
Door and window handles commonly combine aluminum, zinc alloy, stainless steel, carbon steel, brass, and coated components. When dissimilar metals remain electrically connected in the presence of moisture, galvanic corrosion becomes a design concern.
Concealed systems can reduce direct exposure, but they can also hold water behind the cover. Exposed screws receive more environmental contact, yet their condition is easier to inspect.
For coastal, poolside, industrial, or high-humidity projects, I would ask for the exact fastener material rather than accepting “stainless steel” as a complete answer. Type 304 and Type 316 are not interchangeable in every environment, and the screw is only one part of the corrosion couple.
Singapore’s Building and Construction Authority window-safety requirements provide a real regulatory example: retrofit work on variable-geometry window stays requires aluminum rivets to be replaced with Type 304 stainless steel rivets complying with BS EN 10088 or equivalent. That rule concerns window stays rather than handle screws, but its lesson is directly relevant—the fastening material can determine whether the assembly remains safe.
Salt-spray hours should not end the discussion either. ASTM B117 states that standalone salt-spray results have seldom correlated with natural-environment performance and that extrapolation is not always predictable. A supplier saying “240 hours passed” has not proved that moisture trapped beneath a concealed rose will behave properly for ten years.
Test the assembled handle. Test the edges. Test the screws. Then open the cover and inspect what marketing photographs never show.
Standards and Recall Evidence Buyers Should Not Ignore
A clean handle still has to operate legally
The fastening arrangement must not make the lever bind, drag, loosen, or require excessive operating force.
Under the 2010 ADA Standards for Accessible Design, operable parts must work with one hand, without tight grasping, pinching, or wrist twisting, and with an activating force no greater than 5 lbf, or 22.2 N. Interior hinged doors and sliding or folding doors also have a 5 lbf maximum opening-force requirement, subject to the standard’s stated scope and exceptions.
This matters because a mounting plate that distorts under screw load can misalign the spindle or spring cassette. A cover that rubs against the lever neck can add friction. A loose fixing can create unpredictable movement.
The ANSI/BHMA A156.2-2022 hardware guidance covers operational, strength, cycle, finish, material, and dimensional testing for bored and preassembled locks. Its Grade 1 example requires one million operating cycles with a 10-pound axial load, while security evaluation includes a 1,200 in-lbf locked-lever torque test.
Those figures are not universal requirements for every window handle or decorative pull. They make a more important point: serious specifications test the complete assembly under defined loads.
They do not award performance based on whether the screws are visible.
The Pella recall shows what an interface failure can cost
On December 21, 2023, the U.S. Consumer Product Safety Commission announced the recall of about 12,000 Pella Architect Series casement windows because a sash could detach from its frame and fall. The affected windows sold from January 2021 through July 2023 for approximately $700 to $10,000 each, and one sash-detachment incident had been reported.
This was not a recall of concealed handle screws, and it should not be misrepresented as one.
But the Pella casement-window recall is a useful warning against evaluating hardware as isolated decorative objects. The handle, fasteners, hinges, sash, profile, lock, and installation method form one opening system. A weak interface can turn a premium product into a repair campaign.
How I Would Choose Fasteners for Door and Window Handles
1. Define the opening before choosing the screw treatment
Start with the actual application:
Hinged entrance door
Interior lever set
Casement window
Tilt-turn window
Sliding panel
Lift-slide door
Flush pull
Locking window handle
High-traffic commercial opening
Coastal or poolside installation
A concealed rose suitable for a bedroom lever is not automatically suitable for a lift-slide handle transferring substantial manual force.
2. Separate appearance requirements from joint requirements
The design brief can require a screw-free visible face. Fine.
The engineering specification must separately define how the handle is retained. That may involve through-bolts, machine screws into inserts, mounting plates, grub screws, bayonet trim, clip-on covers, or combinations of these features.
Do not let the cosmetic cover become the structural concept.
3. Freeze every critical-to-quality dimension
The approved drawing should identify:
Fixing centres
Thread designation
Screw length
Engagement depth
Boss or insert material
Base thickness
Counterbore or countersink geometry
Cover clearance
Cover-removal direction
Tool-access envelope
Spindle size and engagement
Maximum lever-to-frame interference
Allowable movement after assembly
“Same as sample” is not quality control.
4. Validate installation under factory conditions
A laboratory prototype assembled slowly by an engineer does not represent a production line.
Run the process with normal drivers, normal takt time, real operators, finished components, packaging protection, and the specified screw batch. Check for cross-threading, driver slip, coating damage, under-torque, over-torque, cover distortion, and incorrect screw substitution.
For a new custom platform, the OEM and ODM hardware-development process should lock the screw specification, drawing revision, approved sample, CTQ inspection points, and change-control rules before mass production.
5. Test the complete assembly
At minimum, the validation plan should reflect:
Repeated operating cycles
Lever pull and downward load
Torsional abuse
Fastener loosening
Cover retention
Misalignment
Temperature exposure
Humidity or corrosion exposure
Installation variation
Removal and reassembly
Final operating force
Market-specific requirements must also be checked against the appropriate product and opening standard. The fenestration hardware compliance resources are a practical starting point for separating real assembly evidence from generic “compliant” claims.
FAQs
What are concealed fasteners in door and window handles?
Concealed fasteners are screws, through-bolts, inserts, or clamping elements hidden behind a rose, escutcheon, backplate, snap cover, or removable trim piece, allowing the handle face to remain visually clean while the underlying mounting joint carries operating, pull, twist, and impact loads.
They are commonly used in architectural lever handles, premium pull handles, slim window handles, hotel hardware, and minimalist residential fittings. Their quality depends on the hidden mounting structure and cover-retention design, not merely on the absence of visible screw heads.
Are concealed fasteners stronger than exposed screws?
No, concealed fasteners are not automatically stronger than exposed screws; strength comes from fastener diameter, material grade, thread engagement, clamp load, boss or insert geometry, substrate thickness, load direction, corrosion condition, installation control, and proof testing of the complete door or window handle assembly.
A hidden M4 screw entering a weak die-cast boss may perform worse than an exposed M5 through-bolt. Conversely, a properly reinforced concealed mounting plate can outperform a poorly positioned visible screw system.
What is the best fastening method for a door handle?
The best fastening method for a door handle is the mounting system that matches the door construction, handle load, lock interface, security level, maintenance plan, corrosion exposure, applicable standard, and production process while preserving reliable service access and consistent installation across the full manufacturing batch.
For high-end interiors, concealed through-bolts behind a removable rose may be appropriate. For maintenance-heavy industrial doors, accessible exposed fasteners may be the more rational choice. Fire-rated and security-tested openings must retain the fasteners and installation method covered by the approved assembly.
Are exposed screws less secure?
Exposed screws can be less secure when their heads are reachable from the attack side, easily removed with common tools, or installed into weak material, but visible fasteners can also be highly secure when they use protected placement, through-bolting, security-drive heads, proper reinforcement, and a tested assembly.
Security depends on access, drive type, receiving structure, load path, and whether removing the screw compromises the locked opening. A decorative concealed cap is not automatically more resistant than a correctly installed tamper-resistant exposed fixing.
How should window handle concealed screws be specified?
Window handle concealed screws should be specified by thread size, length, material, finish, fixing centres, engagement depth, receiving feature, tightening method, retention method, cover-removal procedure, allowable torque range, corrosion target, and verification test, all tied to the exact sash profile and lock or espagnolette interface.
The specification should also identify the approved drawing revision and prohibit unapproved substitutions. “Stainless screw,” “standard fixing,” or “hidden screw” is not enough information for repeatable OEM production.
Turn the Handle Drawing Into a Controlled Specification
Choose concealed fasteners when the project genuinely benefits from clean architecture, reduced casual access, smoother cleaning surfaces, or the ability to hide previous fixing marks.
Choose exposed screws when fast inspection, direct servicing, lower component count, and straightforward installation matter more than a screw-free face.
But do not approve either option from a rendering.
Send the profile drawing, handle load, fixing centres, spindle or lock interface, target material, corrosion environment, market requirements, finish, expected annual volume, and service-access expectations. Then require the supplier to return a controlled mounting drawing, screw specification, assembly method, test plan, and cover-removal instructions.