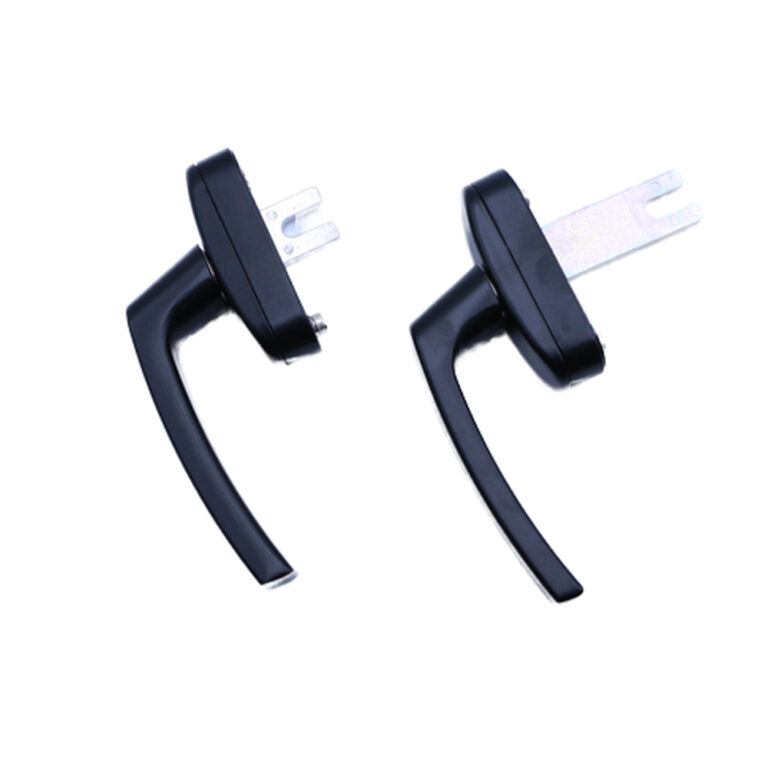
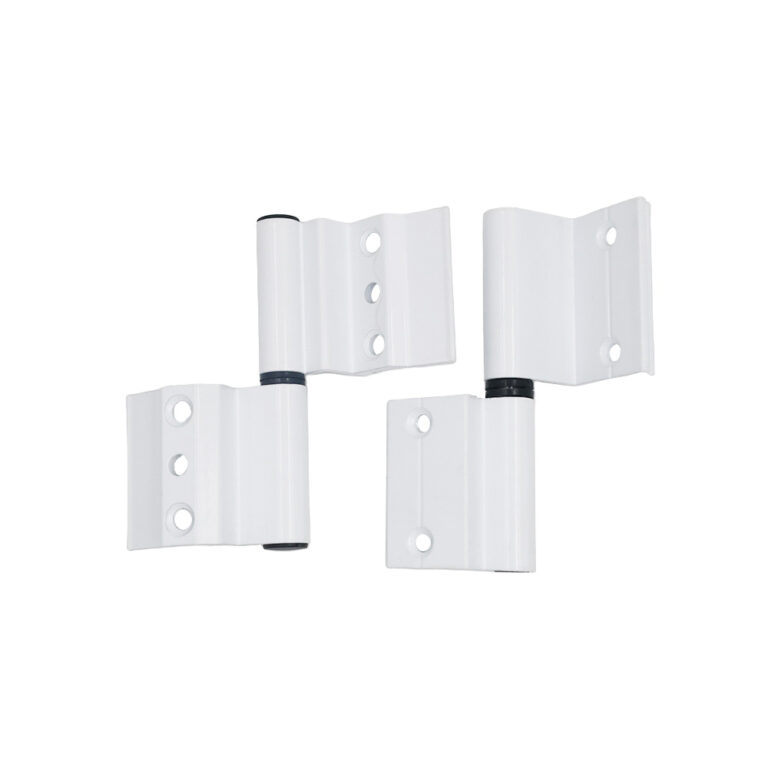
Looking for hardware solutions that meet European / American standards?
Use this guided inquiry modal to move from a generic quote form to a clearer technical conversation. Buyers can choose whether they need pricing, CAD / 3D files, or OEM / ODM support before sharing contact details.
Compatibility-first design across door / window systems
Repeatable production with clear inspection checkpoints
Documentation and change control for long-running programs
Responsive engineering support for fit and field feedback
A sliding handle may begin with a barely noticeable wobble, yet that movement can enlarge fixing holes, distort the handle base, increase stress on the lock interface, damage the panel finish, and eventually leave the user pulling harder against a door that was already difficult to move.
Why do so many repairs stop at tightening two screws?
Because the hardware industry often treats the visible symptom as the failure. I think that is lazy diagnosis. A loose sliding door handle can be caused by damaged threads, panel flex, poor fixing engagement, lock resistance, incorrect handle projection, misaligned rollers, or a neighboring panel striking the handle during travel.
Tightening the screws may hide the problem for a week.
Then it returns.
Sliding Door Handle Problems Rarely Stay Isolated
A sliding door handle sits at the point where the user’s hand, the moving panel, the lock, the fasteners, and the surrounding frame meet. That makes it more than a decorative pull.
It is an interface.
CHIER’s sliding handle range includes recessed pulls, fold-out handles, surface-mounted levers, and other configurations that must be selected around fixing dimensions, projection, panel overlap, operating direction, lock interface, and available clearance. Those variables explain most real sliding door handle problems before materials or finishes even enter the discussion.
A handle can feel loose because the fasteners have moved. It can also feel loose because the panel skin flexes beneath the base. A handle can feel uncomfortable because the grip is too shallow. Or it can feel uncomfortable because the door itself needs excessive force to move.
These are different failures.
They need different fixes.
The three failure groups I check first
Fixing failure: Screws, inserts, threads, mounting bosses, or panel material can no longer hold the handle rigidly.
Grip failure: The user cannot obtain enough finger purchase, clearance, leverage, or friction to operate the panel comfortably.
Interference failure: The handle, hand, lock control, or fixing cover contacts another panel, frame section, insect screen, trim piece, or wall return.
And yes, more than one can happen at once.
A poorly aligned panel may require greater pulling force. That extra force works the fasteners loose. The loose handle then tilts outward and begins striking the adjacent panel.
The final complaint is “the handle is broken.”
The first failure may have been a roller adjustment.
Loose Fixings: Why Tightening the Screws Often Fails
A loose sliding door handle is a handle assembly that moves relative to the door panel because the fixing system has lost clamp force, thread engagement, structural support, or dimensional stability.
That definition matters. It stops us from assuming every wobble can be corrected with a screwdriver.
Under-tightening leaves movement from day one
A screw must generate enough clamp force to hold the handle base against the mounting surface. When it is installed too loosely, tiny movements occur every time the user pulls the panel.
Those movements are small.
The damage is not.
Repeated movement can polish the contact surfaces, enlarge holes, flatten soft panel material, loosen threaded inserts, and create the familiar grey or black debris sometimes found behind a moving handle base.
Over-tightening can be worse
Installers often react to a loose handle by applying more torque. That works until the screw strips a thread, cracks a plastic boss, bends a thin backplate, compresses a soft gasket, or pulls through a hollow aluminum profile.
Then the screw feels tight without producing reliable clamping.
I call this false tightness.
The screwdriver stops. The handle still moves.
A professional sliding door handle repair should therefore check the thread condition, screw length, panel thickness, base flatness, backing support, and fixing-hole diameter before anyone reaches for a longer tool.
CHIER’s guide to why door and window handles become loose over time makes the same wider point: looseness can begin with fixing design, material compression, alignment, operating resistance, or repeated loading rather than one careless installation.
The screw may be holding almost nothing
A common problem in slim aluminum, PVC, timber-composite, and hollow-panel doors is inadequate thread engagement.
Imagine an M4 screw entering only two damaged threads in a thin wall. It may survive inspection. It may even survive several hundred operations. But the user is not applying a clean laboratory load. They pull upward, sideways, outward, and sometimes twist the handle when the lock resists.
That off-axis loading matters.
For bulk sourcing or OEM production, the fixing design should define:
Screw diameter and thread type
Minimum thread engagement
Screw material and strength class
Backing plate, rivet nut, insert, or boss construction
Maximum installation torque
Washer or gasket requirements
Acceptable panel thickness range
Fixing-center tolerance
Pull and twist test conditions
A generic note saying “two screws included” proves almost nothing.
Panel flex can imitate a loose handle
Press the handle base while another person pulls the lever. Does the handle move independently, or does the surrounding panel bow with it?
That distinction is easy to miss.
Thin skins and poorly supported mounting areas can flex even when the screws remain secure. In those cases, fitting larger screws may create fresh damage without correcting the structural weakness. A backing plate, wider base, reinforced insert, or revised fixing position may be required.
This is why concealed fasteners and exposed screws should be compared by mounting geometry and service access, not appearance alone. Hidden screws can produce a cleaner surface, but concealment does not automatically improve strength.
Lock resistance loosens handles indirectly
A user should not have to pull the handle sideways while forcing a thumb turn, hook lock, or latch mechanism into engagement.
But it happens constantly.
When the lock and keeper are misaligned, users compensate with force. They lift the panel, pull it against the frame, push the handle inward, and operate the lock at the same time. Those combined loads work directly against the handle fixings.
So before repairing a loose sliding door handle, operate the panel with the lock disengaged. Then operate the lock while the door is open.
If the handle feels stable during one test but not the other, the lock or panel alignment may be driving the failure.
Poor Grip Is an Engineering Problem, Not a Personal Preference
A sliding door handle has poor grip when its shape, clearance, surface, position, or operating force prevents the user from applying a secure and comfortable pulling action.
That can mean a shallow recess, narrow finger pocket, slippery finish, sharp edge, insufficient knuckle clearance, short lever, awkward operating direction, or a door that simply demands too much force.
Pretty handles fail here.
Frequently.
Recessed handles can become finger traps
A recessed pull may look ideal on an overlapping sliding system because it reduces projection. But reducing projection usually reduces available grip depth.
The user then operates the door with fingertips instead of a full grip. If the recess has sharp edges, a steep entry angle, or little clearance behind the lip, the handle becomes painful under higher loads.
What happens next?
People hook one or two fingers into the recess and jerk the panel. That increases peak force, accelerates wear, and makes a heavy patio door feel worse than it really is.
A better evaluation looks at:
Usable finger depth
Opening width
Edge radius
Grip length
Knuckle clearance
Surface friction
Pull direction
Required panel movement force
Accessibility requirements
Use with wet hands or gloves
CHIER’s detailed discussion of handle ergonomics, grip clearance, lever length, and operating torque is relevant even when the product is a slider rather than a casement handle. The user still needs enough clearance and leverage to overcome the resistance of the complete system.
The 22.2 N number buyers should know
For accessible elements covered by the U.S. ADA Standards, operable parts must work with one hand, must not require tight grasping, pinching, or wrist twisting, and must require no more than 5 pounds-force, equivalent to 22.2 N, to activate. The standards also state a 5-pound maximum opening force for sliding or folding doors where the provision applies.
The distinction matters: not every private residential patio door automatically falls under every ADA provision. But the U.S. Access Board’s operable-parts requirements provide a useful design benchmark for anyone claiming that a handle is comfortable, inclusive, or easy to operate.
My hard view is simple: a handle cannot compensate for a door that drags.
If the rollers are worn, the track is contaminated, the panel is out of square, or the weather seals are applying excessive friction, even a well-designed handle will feel poor. Measure the force needed to start and continue panel movement before condemning the grip geometry.
Surface finish changes the experience
Smooth polished metal can become difficult to grip with wet hands. Aggressive ribbing can improve traction but create uncomfortable pressure points. Soft-touch inserts may improve feel but introduce questions about wear, cleaning chemicals, UV exposure, and adhesion.
And sharp edges are not a theoretical concern.
In July 2019, the U.S. Consumer Product Safety Commission announced the recall of about 70,200 Everbilt model 14339 stainless-steel door pulls because sharp rear edges posed a laceration hazard. Home Depot had received 42 reports, including 11 reports of minor injuries; the pulls had sold for about $6.
That CPSC door-pull recall exposes an industry truth that buyers still resist: low-cost components can create high-cost failures, and the hidden edge matters as much as the catalog-facing surface.
Panel Interference: The Clearance Failure Hidden in Plain Sight
Sliding door handle panel interference occurs when the handle, user’s hand, lock control, or mounting hardware enters the travel space of another panel or nearby building element.
This may involve:
The active panel crossing behind a fixed panel
Two moving panels passing each other
A handle hitting a meeting stile
A thumb turn contacting a neighboring sash
A recessed pull sitting too close to the panel edge
A fixing cover rubbing against an insect screen
A handle striking a wall, reveal, curtain, blind, or trim
The user’s knuckles becoming trapped between panels
The handle can fit perfectly while the door is stationary and still fail in motion.
That is the trap.
Static clearance is not enough
A supplier may check the drawing and see 4 mm of nominal clearance. Fine.
But what happens when:
The panel bows under pulling force?
The rollers wear by 1 mm?
The frame is installed slightly out of square?
The handle base sits proud because of a gasket?
Powder coating adds thickness?
The adjacent panel deflects in wind?
Assembly tolerances stack in the wrong direction?
A nominal gap is not a working gap.
I prefer to evaluate clearance across the complete travel cycle, including the user’s fingers, the maximum handle projection, the lock’s operated position, panel deflection, installation tolerance, and foreseeable wear.
Knuckle clearance is part of the product
Some handles technically clear the neighboring panel, but the user’s hand does not.
That is a design failure.
The user should not need to flatten their fingers, rotate their wrist, or release the handle before the door reaches its normal stopping point. When that happens, poor grip and panel interference become the same complaint.
The risk is not merely inconvenience. A historical U.S. study using Consumer Product Safety Commission NEISS data estimated that 1,392,451 children aged 17 or younger received emergency treatment for door-related injuries between 1999 and 2008—approximately one injury every four minutes. Pinching in a door accounted for 54.8% of the injuries.
That peer-reviewed pediatric door-injury study covered doors generally, not sliding handles specifically, and the data are historical. Still, it gives manufacturers a blunt reminder: hand clearance, pinch zones, and uncontrolled panel movement deserve serious design review.
A Field Diagnosis Table for Sliding Door Handle Problems
Guessing wastes time. Use the symptom to narrow the failure.
Visible symptom
Likely underlying cause
What to inspect
Repair approach
Handle rocks at both ends
Lost clamp force or panel flex
Screw torque, base flatness, backing support, panel movement
Refasten only after confirming support and thread condition
Reposition or replace with recessed/low-profile design
Lock works only when handle is pulled sideways
Keeper or panel misalignment
Hook engagement, roller height, frame square
Adjust panel and keeper; do not rely on handle force
Cracks appear around fixing holes
Over-torque, weak panel material, no load spread
Panel substrate, washer area, screw length
Reinforce mounting zone and replace damaged panel section if needed
Black or metallic dust appears behind base
Fretting movement between components
Base contact, loose fixings, worn coating
Remove movement source; inspect for enlarged holes
Handle edge cuts or scratches the hand
Poor finishing or damaged coating
Burrs, casting flash, sharp rear edges
Stop use and replace; do not merely sand a safety-critical production defect
How to Fix a Loose Sliding Door Handle Properly
A correct repair restores the handle, but it also removes the condition that loosened it.
Step 1: Stop forcing the door
Do not continue using the handle as a lever to overcome a dragging track or misaligned lock. Every forced cycle can enlarge the damage.
Step 2: Test the panel separately
Unlock the door and move it using light pressure on a safe part of the panel. Check for heavy starting force, rough travel, noise, roller drop, track contamination, or contact with seals.
Step 3: Test the lock while open
Operate the handle, thumb turn, latch, or hook mechanism with the panel away from the keeper. If it remains stiff, the resistance may be inside the lock or handle interface.
If it becomes smooth, alignment is the more likely problem.
Step 4: Remove the handle carefully
Photograph the assembly first. Keep screws, washers, covers, and spacers in order.
Look for:
Stripped threads
Cracked bosses
Rotating inserts
Bent backplates
Powder around fixing holes
Compressed gaskets
Oval holes
Corrosion
Burrs
Uneven witness marks
Incorrect screw lengths
Step 5: Inspect the mounting surface
A replacement handle will not stay tight on a damaged mounting point.
Check whether the panel wall has collapsed, the insert is loose, the hole has enlarged, or the handle base is bridging over an uneven surface. On hollow profiles, determine whether the fixing reaches a reinforced section or only a thin outer wall.
Step 6: Repair the fixing system
The proper method depends on the door construction. It may involve an approved threaded insert, rivet nut, backing plate, replacement boss, larger specified fastener, new mounting location, or replacement of the damaged panel component.
Do not improvise with random wood screws, adhesive alone, or an oversized screw that may contact the lock or glass.
And never drill blindly into a glazed panel.
Step 7: Reinstall to a controlled torque
Use the manufacturer’s tightening requirement where available. Tighten both fixings progressively so the base seats evenly.
Threadlocking products may be appropriate in some metal-to-metal assemblies, but they do not repair stripped threads, cracked plastic, or panel flex. They can also make future servicing difficult when used carelessly.
Step 8: Test the complete travel path
Move the panel slowly through its full range. Check the handle, fingers, lock control, screw covers, and adjacent panel.
Then repeat the test under normal user force.
One smooth cycle proves little.
Repair or Sliding Door Handle Replacement?
Repair makes sense when the handle body remains sound, the mounting points can be restored reliably, and the original geometry suits the door.
Replacement is usually the better decision when:
The base or lever is cracked
The fixing bosses have failed
Threads are extensively stripped
The handle projection causes interference
The recess provides poor grip
Sharp edges or coating damage expose the user
The replacement screws cannot engage safely
The lock interface is incompatible
The original model is structurally undersized
Repeated repairs have already failed
Cheap replacement can still be expensive.
A sliding door handle replacement should match the fixing centers, cutout size, panel thickness, lock interface, handing, projection, grip geometry, finish, and dynamic clearance. “Looks similar” is not a specification.
For new programs, CHIER’s OEM and ODM handle development process supports drawing review, mounting-interface checks, sampling, finish selection, packaging, and production control around the buyer’s actual application rather than a generic product photograph.
What Professional Buyers Should Demand Before Approval
I do not trust a sliding handle sample simply because it feels solid on a sales desk.
The sample should be fitted to the intended profile, panel thickness, lock, and neighboring-panel arrangement. Then it should be loaded, operated, removed, inspected, and fitted again.
Minimum information for a serious RFQ
A useful request for quotation should include:
Door or window type
Panel material and thickness
Panel weight
Profile cross-section
Fixing-center dimensions
Cutout dimensions
Maximum permitted projection
Required hand clearance
Panel overlap
Lock or latch interface
Operating direction
Indoor, bathroom, coastal, or exterior exposure
Finish and color
Target cycle count
Pull, twist, and static-load requirements
Packaging and labeling needs
Required inspection records
This is where CHIER’s quality control and hardware testing framework becomes useful. It addresses first-article approval, critical mounting dimensions, fit verification, operating torque, static strength, cycle durability, finish inspection, corrosion evaluation, traceability, and change control.
Test the assembly, not just the handle
A handle can survive a pull test and still fail in service because the fixture was rigid while the real panel flexes.
The test arrangement should represent:
Actual panel material
Actual fixing method
Actual screw engagement
Actual backing structure
Actual lock resistance
Actual pulling direction
Actual neighboring-panel clearance
Ask where the force was applied. Ask how long it was held. Ask whether the handle was inspected for movement afterward. Ask whether the screws were retightened during cycle testing.
A certificate saying “passed” without those details is marketing paper.
The Hard Truth About Patio Door Handle Problems
Most patio door handle problems are blamed on the component the user touches.
That is understandable. It is not always correct.
The handle may be exposing:
Worn rollers
A damaged track
Frame distortion
Poor lock alignment
Excessive seal compression
Incorrect installation
Weak panel reinforcement
Bad fixing geometry
Insufficient grip clearance
Product-selection errors
So the right question is not merely, “Why is my sliding door handle loose?”
Ask this instead:
What load is reaching the handle, why is that load higher than intended, and which part of the assembly is no longer controlling it?
That question leads to a repair.
The first one often leads to another loose screw.
FAQs
Why is my sliding door handle loose?
A sliding door handle becomes loose when its fixing system loses clamp force or structural support because of under-tightening, stripped threads, damaged inserts, panel flex, cracked mounting bosses, repeated side loading, or excessive operating resistance from the rollers, track, seals, latch, or lock alignment.
Remove the handle and inspect every fixing rather than tightening it repeatedly. If the threads are damaged or the panel moves beneath the base, stronger tightening will not provide a lasting repair.
How do I fix a loose sliding door handle?
Fixing a loose sliding door handle means identifying and correcting the damaged fixing, mounting surface, alignment problem, or excessive door resistance before reinstalling the handle with compatible screws and controlled torque, followed by a complete test of the lock, panel movement, hand clearance, and adjacent-panel travel.
Start by operating the panel and lock separately. That simple test helps distinguish a handle fault from roller drag or keeper misalignment.
When should I replace a sliding door handle?
A sliding door handle should be replaced when its body, base, fixing bosses, grip surface, lock interface, or safety edges are damaged, or when its original projection, recess depth, fixing pattern, and hand clearance are fundamentally unsuitable for the door and cannot be corrected through a reliable structural repair.
Match the replacement by dimensions and interfaces. Do not order from appearance alone.
What causes sliding door handle panel interference?
Sliding door handle panel interference is caused when the handle, fasteners, thumb control, or user’s hand enters the travel envelope of another panel, frame member, screen, wall return, blind, or trim because projection, mounting position, overlap, deflection, or installation tolerances were not evaluated dynamically.
Check the whole movement path with a hand on the grip. A handle-only clearance check can miss the actual pinch point.
What is the best sliding door handle for poor grip?
The best sliding door handle for poor grip is a handle that provides sufficient finger depth, edge radius, grip length, knuckle clearance, surface traction, leverage, and one-handed operation while remaining compatible with the panel overlap, lock interface, fixing structure, and force needed to move the complete door assembly.
A larger handle is not automatically better. Projection can create panel interference, while a deeper recess may require a larger cutout or reduce profile strength.
Can I use a longer screw to repair a loose handle?
A longer screw can repair a loose sliding handle only when the original screw lacked sufficient safe engagement and the new length will enter a suitable reinforced section without contacting glass, locks, wiring, drainage paths, or moving components; it cannot restore stripped material, cracked bosses, rotating inserts, or collapsed panel walls.
Confirm the construction before drilling or changing screw length. Hidden components can sit directly behind the mounting surface.
Get the Handle, Fixings and Panel Working as One System
Do not approve another sliding handle by finish alone.
Measure the fixing centers. Check the panel thickness. Record the handle projection. Test the grip with real hands. Move both panels through their complete travel. Measure operating resistance. Inspect the lock interface. Then test the assembled product until weak fixings, poor clearance, and hidden interference reveal themselves.
For an existing problem, document the symptoms and inspect the complete sliding system before ordering a replacement.
For a new OEM or private-label program, review CHIER’s sliding handle options and submit the panel drawing, profile section, fixing requirements, lock details, finish target, annual quantity, and test expectations through the OEM/ODM development team.