Looking for hardware solutions that meet European / American standards?
Use this guided inquiry modal to move from a generic quote form to a clearer technical conversation. Buyers can choose whether they need pricing, CAD / 3D files, or OEM / ODM support before sharing contact details.
Compatibility-first design across door / window systems
Repeatable production with clear inspection checkpoints
Documentation and change control for long-running programs
Responsive engineering support for fit and field feedback
A door handle can arrive in a foam-lined box looking flawless because someone selected the best casting, polished it by hand, adjusted the spring, touched up the coating, and tightened every screw shortly before shipment.
So what exactly are you approving?
That question separates serious door handle quality inspection from what I call “courier-box quality control.” The buyer studies one beautiful object. The factory prepares for 20,000 units. Everyone signs the sample, yet nobody defines which materials, dimensions, components, processes, or test results must remain unchanged.
That is how quality drift begins.
A proper door handle sample inspection must determine whether the supplier can reproduce the approved design through normal casting, machining, finishing, assembly, inspection, and packaging processes. It is not an art review. It is a production-risk investigation.
The uncomfortable truth is simple: you should never approve a door handle sample until you know whether it was handmade, prototype-tooled, pilot-produced, or taken from a stable production line.
The Sample Is Not the Product
Professional buyers often treat “sample approved” as a complete instruction. It is not.
Approval can mean at least four different things:
The shape looks acceptable.
The handle fits one test door.
The sample meets the released drawing.
The supplier has demonstrated a repeatable production process.
Only the fourth meaning protects a mass-production order.
This distinction matters because real hardware failures are not always cosmetic. In 2007, the U.S. Consumer Product Safety Commission announced the recall of approximately 25,000 Stanley Keyed 5K Series door handle locks after three reported failures. The locks could fail to unlock from inside, creating an entrapment hazard during an emergency. The recalled products had sold for roughly $65 to $115 each. Read the Stanley Keyed 5K Series recall.
In August 2021, CPSC reported another recall involving about 2,400 dormakaba DE8310 delayed-egress locksets. Again, the stated hazard was failure to open and possible entrapment during an emergency. See the dormakaba DE8310 recall notice.
Those were established hardware companies. Not unknown workshops.
Why would any professional buyer assume that a smooth-looking sample proves safe, repeatable operation?
Before approving anything, ask the supplier to classify the sample in writing:
Appearance prototype
Functional prototype
Tooling sample
Pilot-run sample
Production-equivalent sample
I place the most trust in a production-equivalent sample made with the intended alloy, tooling, machining fixtures, coating line, internal components, assembly method, fasteners, lubricant, and packaging.
Anything else needs a visible limitation on the approval document.
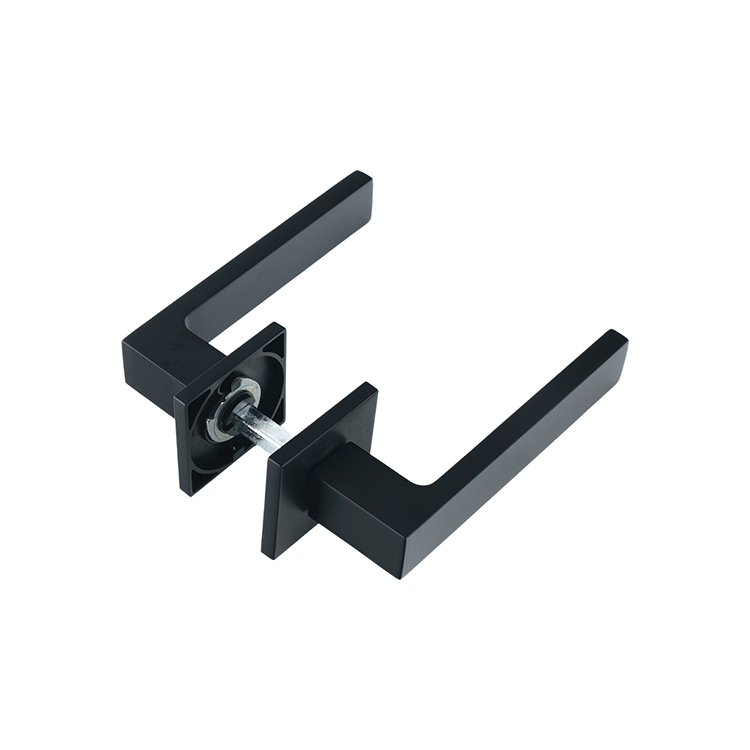
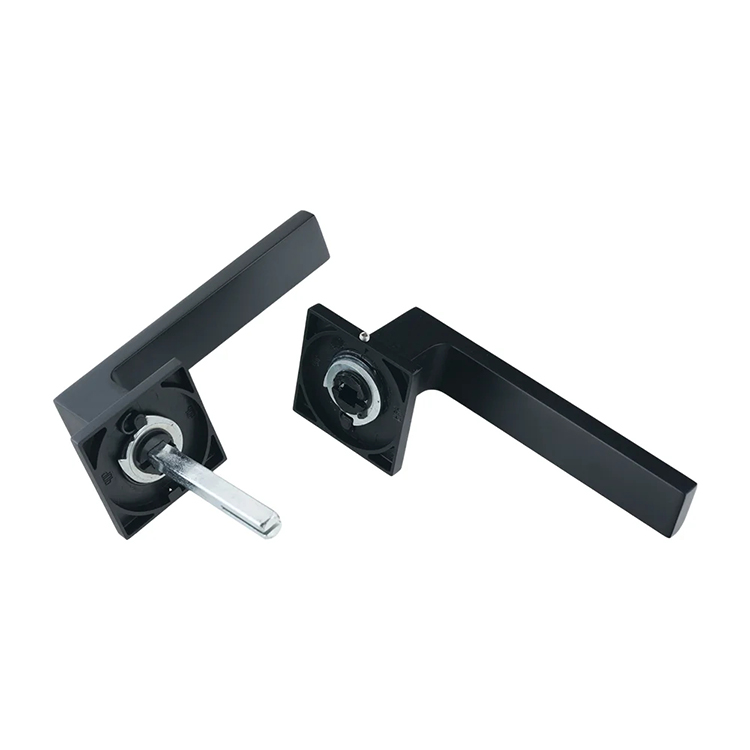
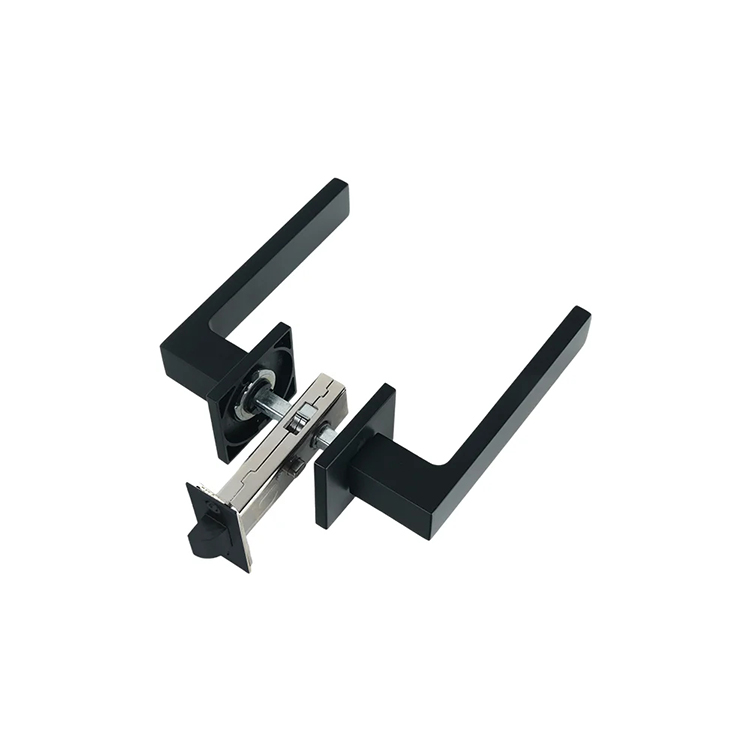
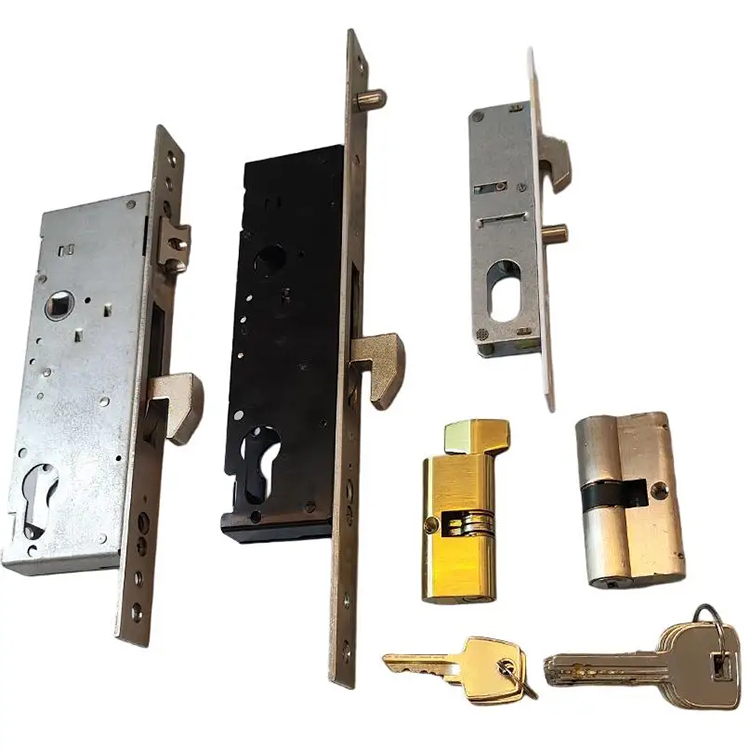
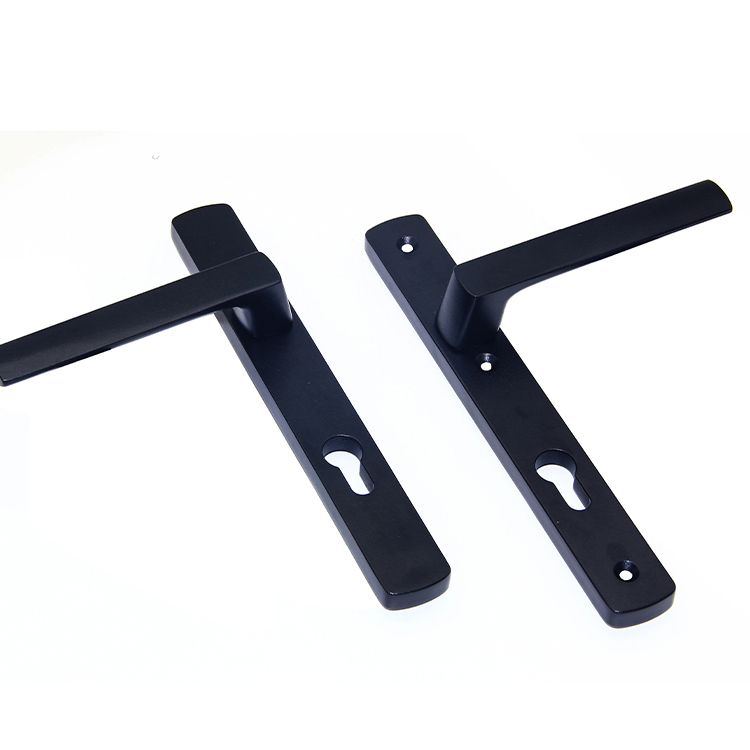
Buyers comparing different mechanisms should first review the actual door and window handles collection rather than applying one generic inspection method to lever handles, sliding handles, flush pulls, fork handles, and integrated lock handles. Their failure modes are not identical.
Build the Inspection File Before Touching the Handle
My rule is blunt: no drawing, no approval.
A sample without a controlled specification becomes a memory contest. The buyer remembers the finish as slightly warmer. The supplier remembers it as standard matte black. Six weeks later, both sides are holding different objects and claiming the other side changed something.
Build a pre-production sample inspection file containing:
Product name and model number
Customer SKU
Supplier SKU
Drawing number and revision
Bill of materials revision
Sample production date
Tooling status
Material specification
Surface-treatment specification
Color code or approved physical finish chip
Component list
Packaging specification
Test standards and acceptance limits
Sample photographs
Signed defect and deviation record
The CHIER OEM/ODM development process follows a staged route from requirements and DFM review through samples, pilot production, golden-sample approval, mass production, inspection, and written change control. That sequence is worth protecting contractually because it ties approval to a documented revision instead of an untraceable object.
Create a CTQ list
CTQ means “critical to quality.” It is not every measurement shown on the drawing. It is the smaller group of dimensions or characteristics that can destroy fit, operation, appearance, safety, or assembly consistency.
For a lever door handle, the CTQ list may include:
Mounting-hole centers
Spindle size and spindle engagement depth
Rose or backplate dimensions
Handle projection
Lever length
Door-thickness range
Screw length and thread specification
Return-spring angle
Rotational travel
Clearance between lever and rose
Latch or gearbox interface
Left-hand and right-hand orientation
Cylinder or thumb-turn alignment
Coating thickness
Visible color and gloss range
Do not write “dimensions must be correct.” Write the nominal dimension, tolerance, measuring method, datum, and sample quantity.
Measure it twice.
And when a dimension controls both visual alignment and mechanical engagement, measure it using the actual profile, lockcase, spindle, fasteners, and door thickness instead of trusting a loose component on a granite table.
A sample can meet every isolated dimension and still fail as an assembly. What does the customer install: a measurement report or a working door?
Run the Door Handle Quality Inspection in This Order
A disciplined door handle inspection checklist moves from identity and appearance into dimensions, assembly, operation, durability, corrosion, and packaging. Reversing that order wastes time because there is little value in running a 96-hour corrosion test on the wrong revision.
1. Confirm identity and revision
Photograph the unopened package, labels, sample quantity, model markings, and individual parts.
Then verify:
Drawing revision
Finish code
Handing
Spindle length
Screw set
Spring cassette
Escutcheon or rose
Gaskets and plastic isolators
Installation instructions
Logo position
Packaging label
Mark every inspected sample with a unique number such as S01, S02, S03, S04, and S05. Test records should refer to those numbers.
Never allow “the black sample” to become an official identity.
2. Inspect appearance under controlled conditions
Do not inspect one sample beside a sunny window and another beneath a yellow warehouse lamp.
Set a repeatable inspection condition. A practical project specification might require evaluation at approximately 600 to 1,000 lux under a defined neutral light source, from a viewing distance of 500 mm, after the surface has been cleaned with an approved lint-free cloth.
Check for:
Color mismatch
Gloss inconsistency
Orange peel
Dust inclusions
Pinholes
Flow marks
Burrs
Sink marks
Parting lines
Exposed substrate
Sharp edges
Polishing waves
Plating stains
Scratches
Logo distortion
Uneven gaps
Visible fasteners
Finish differences between the lever, rose, screws, and cylinder
Hard truth: “matte black” is not a specification.
It can refer to polyester powder coat, epoxy-polyester powder, electrophoretic coating, anodizing, PVD, wet paint, or another finish system. Two finishes can look almost identical on day one and age very differently.
For design-led aluminum systems, the modern aluminum handle design guide is a useful internal reference because it connects appearance with grip clearance, profile geometry, operating torque, finish selection, and the actual opening system.
3. Verify material and surface treatment
Ask for the exact material, not “aluminum,” “zinc,” or “stainless steel.”
Useful declarations include:
ADC12 die-cast aluminum
Zamak 3 or Zamak 5 zinc alloy
304 stainless steel
316 stainless steel
Carbon-steel spindle with specified plating
PA6 or PA66 engineering polymer
Specified spring-steel grade
Then confirm how the declaration will be verified. Depending on the project, that may involve an alloy certificate, positive material identification, X-ray fluorescence analysis, hardness testing, coating-thickness measurement, or third-party laboratory testing.
A material report for the lever does not prove the spindle, spring, screws, retaining rings, and concealed steel inserts use the same corrosion strategy.
Hidden parts fail too.
4. Measure every functional interface
Use calibrated calipers, micrometers, pin gauges, thread gauges, height gauges, angle gauges, a CMM, or dedicated checking fixtures as appropriate.
Record actual values. Do not merely check a “PASS” box.
A useful report looks like this:
Characteristic
Specification
S01
S02
S03
S04
S05
Result
Mounting centers
43.0 ± 0.2 mm
43.02
42.98
43.05
43.01
42.96
Pass
Spindle socket
8.0 +0.08/-0.00 mm
8.03
8.04
8.02
8.03
8.05
Pass
Lever return angle
0° ± 2°
1.0°
0.5°
1.5°
1.0°
0.5°
Pass
Handle projection
62.0 ± 0.5 mm
62.2
62.1
61.9
62.3
62.0
Pass
These numbers are illustrative. Your tolerances must come from the released design and its functional stack-up.
And do not let the supplier quietly widen the tolerance after the sample fails. A wider tolerance is a design change, not a corrective action.
5. Install the handle on the intended assembly
A professional pre-production sample inspection uses the real door, profile section, lockcase, gearbox, latch, cylinder, spindle, gasket, screws, and reinforcement arrangement whenever possible.
Check:
Mounting-hole alignment
Screw engagement
Rose seating
Lever clearance
Spindle insertion
Lockcase engagement
Latch retraction
Bolt movement
Cylinder operation
Handing
Return-to-horizontal position
Interference with seals or frame
Operation at minimum and maximum door thickness
Operation after normal installation torque is applied
One loose demonstration profile is not enough when the handle will be sold across several extrusion systems.
6. Measure operating force and tactile behavior
“Feels smooth” is weak evidence.
Use a force gauge or torque gauge to record:
Initial breakaway force
Running force
Maximum activation force
Return force
Lever free play
Vertical movement
Axial movement
Rotational backlash
Latch retraction
Full return after release
For U.S. accessibility applications, the 2010 ADA Standards for Accessible Design state that operable parts must work with one hand, without tight grasping, pinching, or wrist twisting, and require no more than 5 pounds, or 22.2 N, of activation force. Door and gate handles, pulls, latches, and locks are directed to those operating requirements. Applicability still depends on the building, opening, jurisdiction, and complete assembly.
Enforcement is not theoretical. A U.S. Department of Justice settlement involving AmericInn/Wyndham documented doors measured at 7, 10, 12, and 15 pounds where the applicable maximum opening force was 5 pounds. Review the DOJ accessibility findings.
Do not confuse handle activation force with every other force in the door system. Latch retraction, seals, hinges, closers, door weight, misalignment, and installation can each alter the user experience.
That is why I test the handle alone and the installed opening.
7. Challenge the fasteners and internal mechanism
Operate each sample repeatedly while watching the weakest details:
Lever-to-spindle connection
Set screw
Circlip
Spring cassette
Plastic bushing
Retaining washer
Threaded inserts
Rose clips
Cover plate
Cylinder screw
Mounting posts
Use the specified installation torque. Then mark screw positions with a removable witness line and check for movement after repeated operation.
If the supplier cannot state the installation torque, thread-locking method, or fastener grade, the assembly instruction is incomplete.
8. Perform door handle durability testing
A few hand cycles prove almost nothing.
Your door handle durability testing plan should define:
Test fixture
Installed geometry
Applied load
Operating speed
Rest intervals
Total cycles
Lubrication condition
Environmental condition
Inspection intervals
Failure definition
Post-test dimensional and functional checks
For initial sample screening, I may run 500 to 2,000 fixture cycles to expose obvious spring, fastener, bushing, and return problems. That is not a claim of certified service life. It is an engineering screen.
Formal cycle targets must come from the applicable product standard, customer specification, market, hardware class, and complete assembly. Never print “tested to 100,000 cycles” without identifying the test method, load, fixture, laboratory, sample quantity, failure criteria, and report number.
Big numbers sell. Details protect.
9. Test corrosion without believing the marketing
Salt spray testing can expose coating discontinuities, edge corrosion, poor pretreatment, plating defects, and vulnerable fasteners. It cannot independently predict how many years a handle will survive beside the ocean.
ASTM states that ASTM B117 creates a controlled corrosive environment for comparative testing, while warning that stand-alone salt spray results have seldom correlated reliably with natural-environment performance. See the ASTM B117 standard overview.
The current ISO 9227:2022 salt spray standard similarly explains that salt spray tests can detect pores and defects in coatings, but the standard itself does not set a universal exposure period or acceptance result for every product. Those details must come from the relevant product specification.
So “passed salt spray” is meaningless unless the report identifies:
ASTM B117 or ISO 9227:2022
NSS, AASS, or CASS method
Sample preparation
Exposure time
Sodium chloride, NaCl, test conditions
Scribe or unscribed specimen
Evaluation intervals
Permitted red rust
Permitted white corrosion
Blistering limit
Creepage limit
Edge and fastener requirements
Photographs before and after testing
Laboratory identity
Exact tested model and finish
The site’s detailed salt spray testing guide for door and window hardware expands on why the test method, sample condition, screws, springs, coating preparation, and written acceptance limits must be agreed before production.
10. Inspect packaging as part of the product
Packaging defects create scratches, mixed fasteners, missing parts, wrong labels, and warehouse confusion. Buyers often approve packaging last, when the goods are already finished and leverage has disappeared.
Open and repack the sample as a customer would.
Check:
Protective film
Foam or paper contact points
Plastic-bag thickness
Moisture protection
Hardware separation
Screw quantities
Instruction sheet
Barcode readability
SKU accuracy
Finish identification
Country-of-origin marking
Inner-carton quantity
Master-carton quantity
Carton strength
Drop-test requirement
Mixed-SKU controls
Use the CHIER factory tour and QC process to show sourcing and quality teams where incoming inspection, CTQ checks, surface finishing, final assembly, pack verification, batch records, and revision controls fit into the wider production system.
The Buyer’s Acceptance Matrix
The best door handle quality checks produce an approval matrix that another inspector can repeat without calling the product manager for interpretation.
Here is a practical structure:
Inspection area
Recommended method
Sample quantity
Acceptance basis
Stop-production trigger
Model and revision
Label, drawing and BOM review
All samples
Exact match to released documents
Wrong revision or undocumented substitution
Visual finish
Controlled lighting and master reference
All samples
Approved color, gloss and defect limit
Exposed substrate, severe mismatch or repeated coating defect
CTQ dimensions
Caliper, gauge, CMM or fixture
At least 5 pieces
Released drawing and tolerance
Any safety or interface dimension outside tolerance
Fitment
Intended profile and mating hardware
At least 3 assemblies
Full installation without forced modification
Misalignment, interference or insufficient engagement
Operating force
Force or torque gauge
At least 5 pieces
Project specification; legal limits where applicable
Binding, non-return or excessive activation force
Fastener retention
Defined torque plus cycling
At least 3 pieces
No loosening, stripping or visible movement
Set-screw migration or insert failure
Durability screen
Controlled cycle fixture
At least 3 pieces
Agreed cycles and failure definition
Spring, bushing, spindle or return failure
Coating thickness
Calibrated thickness method
At least 5 points per part
Finish specification
Below minimum or highly uneven application
Corrosion
ASTM B117 or ISO 9227 route
Usually 3 or more
Agreed method, duration and defect limit
Rust, blistering or creepage beyond limit
Packaging
Pack-out audit and transport checks
One complete pack per SKU
Approved packaging specification
Missing parts, mixed SKU or surface damage
The quantities above are a risk-based starting point, not a universal standard. High-risk, safety-related, new-tooling, or high-volume projects may require more samples, destructive tests, independent laboratories, or a pilot batch.
Where Sample Approval Usually Fails
The supplier changes hidden components
The approved sample contains one spring. Production contains another.
The approved sample uses a stainless screw. Production receives zinc-plated carbon steel.
The approved sample uses a machined spindle. Production uses a cheaper formed part.
The outside still looks correct, so nobody notices until operation, corrosion, or warranty claims expose the substitution.
Freeze the bill of materials. Require written approval before any material, supplier, process, coating, lubricant, tolerance, or packaging change.
The sample was hand-tuned
Prototype adjustment is normal. Hiding it is not.
Ask what manual work was performed after normal production:
Hand polishing
Filing
Hole reaming
Spring adjustment
Screw replacement
Coating touch-up
Lever straightening
Extra lubrication
Selective assembly
Repeated disassembly
Then decide whether those steps will become controlled production operations or whether the design and process need correction.
The buyer approves a color, not a finish system
A master color chip does not identify pretreatment, coating chemistry, film thickness, cure schedule, adhesion, UV behavior, corrosion resistance, or batch variation.
Approve the complete finish specification.
Testing is done on a different model
This happens more often than buyers admit.
A supplier presents a corrosion report for a similar silver handle, a cycle report for a different spring cassette, or a material report covering the body but not the internal mechanism.
Reject family-level claims unless the standard and engineering rationale allow them. The tested model, substrate, coating, geometry, components, and production site must match the product being approved.
The buyer signs without listing deviations
A sample can be conditionally approved. But every open issue must have:
A unique deviation number
Photograph
Measured result
Required correction
Responsible party
Due date
Resampling requirement
Approval status
“Please improve this in production” is not an approval instruction. It is an invitation to argue later.
Turning One Approved Sample into Mass Production Control
The golden sample is the bridge between product development and mass production quality control. It should be a locked reference, not a dusty handle sitting unlabelled in someone’s drawer.
Prepare at least two controlled golden samples when practical:
One retained by the buyer
One retained by the supplier
Seal, label, photograph, and sign them. Record the model, revision, finish, approval date, and permitted use. For long programs, a third reference can remain with the inspection agency or quality laboratory.
But do not rely on the golden sample alone. Physical samples can fade, corrode, become scratched, get repaired, or disappear.
The production control package should include:
Released drawing and CTQ list
Approved bill of materials
Finish specification and physical reference
Approved component suppliers where required
Assembly work instruction
Installation torque requirements
Functional inspection method
Durability-test method
Corrosion-test method and acceptance criteria
Packaging specification
Defect classification
Sampling plan
Batch-identification method
Change-control procedure
Do not misuse AQL
AQL is not permission to manufacture defects.
The January 2026 edition of ISO 2859-1:2026 defines single, double, and multiple acceptance-sampling plans indexed by an acceptance quality limit for lot-by-lot inspection. It replaced the withdrawn 1999 edition and added updated guidance, including skip-lot procedures.
AQL belongs to production-lot acceptance. It should not be used as an excuse to approve two good pieces from a five-piece development sample while ignoring one serious failure.
For a commercial hardware program, my opening proposal might be:
Critical defects: AQL 0 or zero acceptance
Major defects: AQL 1.0
Minor defects: AQL 2.5
Those values are negotiation points, not commands from ISO 2859-1. Product risk, supplier history, lot size, inspection level, legal exposure, warranty cost, and customer requirements should determine the final plan.
Critical defects may include:
Entrapment risk
Failure to retract the latch
Sharp edge causing injury
Wrong fire-rated component
Wrong handing that prevents safe operation
Structural breakage
Missing safety component
Prohibited material
Incorrect security function
A scratch is not the same as an entrapment hazard. Your defect catalogue must reflect that.
FAQs
What is a door handle sample inspection?
A door handle sample inspection is a documented pre-production evaluation that verifies the handle’s identity, dimensions, materials, finish, installation fit, operating force, internal mechanism, durability, corrosion resistance, markings, accessories, and packaging against an approved drawing and written acceptance criteria before the supplier receives authorization to begin mass production.
The inspection should also identify whether the sample came from prototype tooling, pilot production, or the intended production process. Approval should remain tied to a named revision and recorded deviations.
What are the best door handle quality checks?
The best door handle quality checks combine controlled visual inspection, CTQ dimensional measurement, installation on the intended door system, force and torque readings, fastener-retention checks, repeated functional cycling, material and coating verification, corrosion testing under a named standard, and complete packaging inspection using measurable pass-or-fail limits.
No single test proves overall quality. The strongest inspection plan follows the product from its visible finish through its concealed components and final installed operation.
What is a golden sample in door hardware quality control?
A golden sample is a formally approved, labelled, signed, photographed, and revision-controlled physical reference representing the accepted door handle’s appearance, assembly, operation, components, markings, and packaging, retained by the buyer and supplier as a comparison standard for pilot production, mass-production inspection, future reorders, defect disputes, and proposed engineering changes.
It should support the drawing and specification, not replace them. Physical references alone cannot control hidden materials, tolerances, coating chemistry, or later component substitutions.
How many door handle samples should be inspected before production?
A practical door handle sample inspection normally evaluates at least five production-equivalent units for visual, dimensional, and operational consistency, with three or more units reserved for assembly, cycling, corrosion, torque, or destructive checks; however, the correct quantity depends on tooling status, safety risk, product complexity, expected volume, test severity, and customer requirements.
One sample is rarely enough to expose variation. For new tooling or unfamiliar suppliers, a controlled pilot run gives far better evidence than a carefully selected presentation sample.
Is salt spray testing enough to approve a door handle finish?
Salt spray testing is an accelerated comparative corrosion method that can reveal coating pores, weak pretreatment, exposed substrate, vulnerable edges, and fastener problems, but it cannot independently predict outdoor service life or approve a finish unless the test standard, specimen condition, exposure period, inspection intervals, and allowable corrosion defects are defined in advance.
Use it with coating-thickness checks, adhesion verification, material review, outdoor exposure knowledge, and inspection of all dissimilar-metal interfaces.
How do I prevent the approved sample from changing during mass production?
Change prevention is a controlled manufacturing system that freezes the approved drawing, bill of materials, CTQ dimensions, component sources, finish process, work instructions, packaging, golden sample, inspection plan, and revision number while requiring written buyer authorization before the supplier changes any material, tolerance, subcontractor, tool, coating, fastener, lubricant, or assembly method.
Batch identification and retained production samples make later investigations much faster. Verbal promises do not provide dependable change control.
Approve the Process, Not Just the Handle
Do not send a one-line message saying, “Sample looks good. Start production.”
Send a signed approval package.
Ask the supplier to confirm the drawing revision, BOM, CTQ dimensions, production process, finish specification, test plan, golden sample, pilot-run quantity, inspection level, defect limits, packaging reference, and written change-control procedure before buying raw material for the full order.
Then inspect the pilot batch.
For a technical review of a new handle program, prepare the profile drawing, door thickness, mating lock or gearbox, spindle specification, finish target, operating-force target, corrosion environment, annual volume, packaging requirements, and destination market. Submit that package through the CHIER OEM/ODM hardware program and request a written sample-build plan with measurable acceptance criteria before mass production begins.