Vous recherchez des solutions matérielles conformes aux normes européennes et américaines ?
Au lieu de remplir un long formulaire de demande de renseignements, choisissez d'abord le sujet qui vous intéresse et nous vous guiderons vers la prochaine étape.
Vous recherchez des solutions matérielles conformes aux normes européennes/américaines ?
Utilisez ce modèle de demande guidée pour passer d'un formulaire de devis générique à une conversation technique plus claire. Les acheteurs peuvent choisir s'ils ont besoin d'un devis, de fichiers CAO / 3D ou d'une assistance OEM / ODM avant de communiquer leurs coordonnées.
Une conception qui privilégie la compatibilité entre les systèmes de portes et de fenêtres
Production reproductible avec des points de contrôle clairs
Documentation et contrôle des modifications pour les programmes de longue durée
Support technique réactif pour l'ajustement et le retour d'information sur le terrain
Échantillonnage : prototypes + validation de l'ajustement + contrôles fonctionnels
Parler à notre patron
No. 8 South Sanjian Development Zone, Bajia, Jinsha, Danzao Town, Nanhai District, Foshan, Guangdong, Chine
Lorsqu'une poignée de fenêtre commence à vaciller, à s'affaisser, à coincer ou à se détacher de son support, ce mouvement visible est souvent le dernier symptôme d'un dysfonctionnement qui a pris naissance ailleurs : à l'intérieur du logement de la tige, derrière la plaque de fixation, le long du bord du vantail ou au niveau d'un mécanisme de commande surchargé.
Pourquoi le secteur continue-t-il à présenter cela comme un problème lié aux deux vis ?
Ma position est claire : ne resserrez jamais la poignée d'une fenêtre avant d'avoir déterminé la cause de son desserrage. Un tournevis peut masquer le problème pendant une semaine, tandis que le filetage abîmé, l'affaissement du châssis, la corrosion ou une résistance excessive au verrouillage continuent d'endommager le mécanisme.
Les conséquences en matière de sécurité ne sont pas purement théoriques. Le 7 avril 2026, le La Commission américaine de la sécurité des produits de consommation a indiqué que Selon les estimations, environ 5 600 enfants âgés de 12 ans et moins ont été pris en charge aux urgences à la suite d’une chute depuis une fenêtre en 2024. Environ un tiers d'entre eux ont dû être hospitalisés. La CPSC a également recensé au moins 25 décès entre 2021 et 2023, dont 80% survenus entre mai et octobre.
Une poignée ne constitue pas en soi un dispositif de sécurité. Cependant, une poignée qui ne permet plus de fermer, de verrouiller ou de contrôler correctement une ouverture nécessite une intervention immédiate.
La dure réalité : la plupart des problèmes liés aux poignées de fenêtre trouvent leur origine ailleurs
Une poignée de fenêtre ne sert pas seulement à offrir un point d'appui à la main. Sur une fenêtre à battants, oscillo-battante ou à espagnolette, elle transmet la force exercée par l'utilisateur, via un axe carré ou un mécanisme à engrenages, au corps de la serrure, au rail d'entraînement, aux cames, aux galets en forme de champignon, aux crochets ou à d'autres points de verrouillage.
Le levier visible n'est que la partie visible de l'iceberg.
Au Royaume-Uni, une poignée de rechange bon marché coûte entre 8 et 20 £ environ sur le marché de détail, tandis que les estimations publiées pour 2025 évaluaient le prix d'un remplacement effectué par un professionnel à partir d'environ 40 £. Cette différence de prix incite les gens à changer immédiatement leur poignée. Mais remplacer une poignée à 15 £ sans vérifier la longueur de l'axe, l'entraxe des vis, la résistance de la serrure et l'alignement du vantail revient à faire de fausses économies.
Avant de commander quoi que ce soit, identifiez la couche qui présente un dysfonctionnement :
Couche de levier : La poignée, le ressort de rappel, le cran d'arrêt ou le corps interne de la poignée sont usés.
Couche de montage : Les vis, les filetages, la plaque de base, le renfort ou la paroi profilée ne maintiennent plus solidement la poignée.
Couche de commande : L'interface de l'axe carré de 7 mm, du suiveur, de la fourche ou du réducteur présente un jeu excessif.
Couche « Système de fenêtres » : Un affaissement des charnières, un jeu du cadre, un désalignement de la gâche, une pression excessive sur le joint, la présence de saleté ou de la corrosion rendent la serrure difficile à actionner.
C'est cette quatrième couche qui est à l'origine du plus grand nombre de remplacements inutiles.
Le guide détaillé sur prévention du grippage dans les serrures de fenêtre à plusieurs points souligne le même aspect mécanique : l'affaissement des charnières, la déformation du cadre, les loquets trop serrés, les joints trop comprimés, les pièces de quincaillerie encrassées et la corrosion peuvent tous contraindre la poignée à absorber la résistance générée ailleurs.
Alors, arrêtez de rejeter la faute sur le levier.
Matrice des types de pannes : diagnostiquez avant de réparer
Consultez ce tableau avant d'intervenir sur les vis de fixation.
Symptôme
Causes les plus probables
Test de dépistage rapide
Première action correcte
Cessez d'utiliser la fenêtre lorsque
La base de la poignée bouge par rapport au châssis
Vis desserrées, filets abîmés, renforts insuffisants, plaque de base fissurée
Maintenez le levier immobile et ne déplacez que la base
Retirer les capots et vérifier la solidité des fixations
La base se détache, les vis tournent dans le vide ou le profilé se fissure
Le levier vacille, mais la base reste stable
Douille de broche usée, jeu au niveau de la broche, suiveur usé, usure interne de la poignée
Tenez la base et déplacez le levier d'un côté à l'autre
Retirez la poignée et vérifiez l'engrènement de l'axe
Le levier peut tourner sans déplacer la serrure
La poignée reste affaissée après avoir été relâchée
Ressort de rappel défectueux, cliquet usé, boîte de vitesses surchargée, butée interne cassée
Testez la poignée démontée à l'écart de la fenêtre
Remplacez la poignée si elle continue à pendre hors de la fenêtre.
Il ne reste plus dans une position définie, qu'il soit ouvert ou verrouillé.
La poignée ne fonctionne que lorsque la vitre est fermée
Désalignement du loquet, affaissement du vantail, compression du joint, déformation du châssis
Actionnez la poignée lorsque le vantail est ouvert, puis fermé
Veiller à un alignement correct avant de remplacer les pièces
Heavy force, grinding, or bending is required
Handle sticks in both open and closed positions
Gearbox damage, corrosion, contamination, bent drive rail
Remove handle and test mechanism carefully
Inspect gearbox and drive components
The spindle twists, jumps, or locks suddenly
Screws repeatedly loosen
Wrong screw length, damaged threads, vibration, base movement, poor substrate
Inspect screws, spindle, rails, and concealed joints
Clean, dry, assess corrosion, then lubricate correctly
Red rust, cracked components, or seized parts appear
One warning matters more than the others: do not force a sticking handle. If the sash is 1–2 mm out of alignment, applying extra lever force can turn a correctable geometry problem into a stripped follower, bent rod, or failed gearbox.
Le guide du site consacré à les tolérances du cadre qui empêchent la fixation du matériel is useful here because smooth operation depends on the frame, sash, keeps, hinges, and lock moving along the intended axes. A handle cannot compensate indefinitely for structural drift.
Wobble: Find the Moving Interface
Wobble is not one fault.
If the complete base plate moves against the window frame, the mounting system is failing. If the plate remains firm while the lever rocks around the spindle axis, the handle body, spindle fit, or lock follower is worn.
When the base plate moves
Remove the decorative screw covers without gouging the coating. Support the handle, then check both fasteners.
You are looking for:
Screws that have backed out
Screws that turn without tightening
Screws that bottom out before clamping the plate
Elongated mounting holes
Cracked plastic or aluminum around the fixing points
Missing reinforcement behind a thin profile wall
A bowed base plate
Corrosion beneath the screw heads
Tightening works only when the threads and substrate remain sound. Do not install a larger screw automatically. An oversized fastener can split a polymer profile, damage reinforcement, clash with the gearbox, or leave too little edge distance around the hole.
And do not flood the screw with permanent threadlocker. Low-strength thread-retaining products may suit some metal-to-metal assemblies, but they should not replace correct thread engagement, proper screw length, and a stable mounting surface.
When the lever moves but the base stays solid
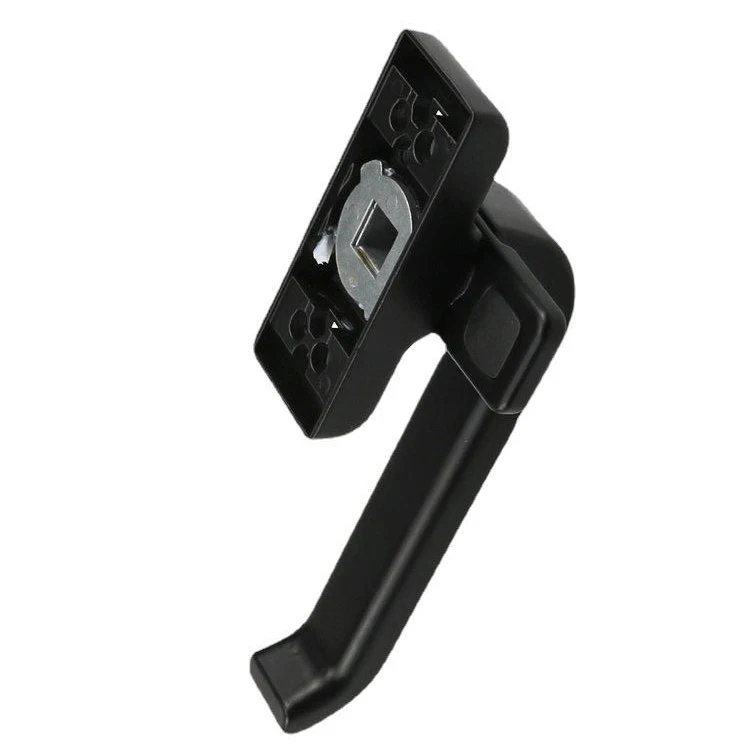
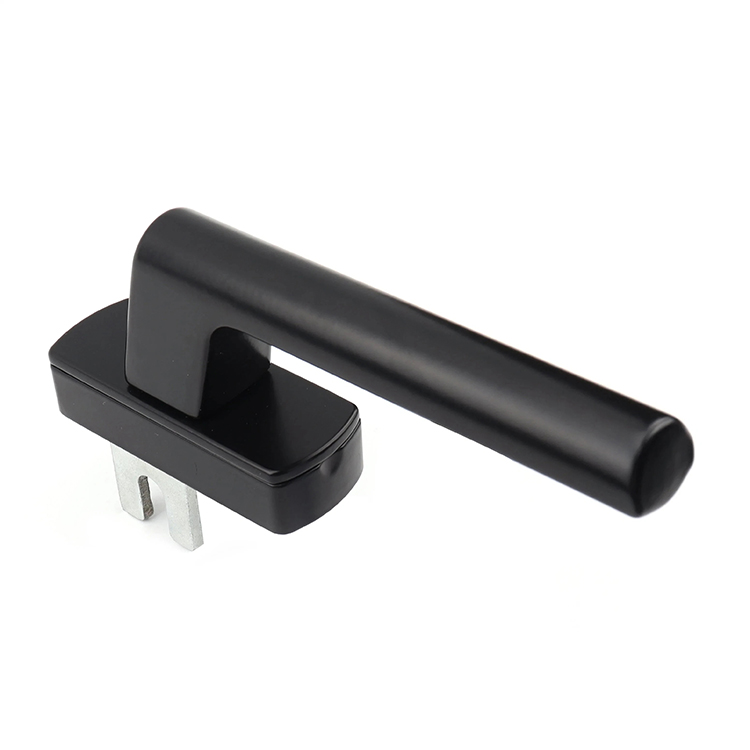
Remove the handle and inspect the spindle. Common espagnolette arrangements use a 7 mm square spindle and often use 43 mm fixing centres, but “common” does not mean universal. Measure the actual component.
Vérifiez les points suivants :
Rounded spindle corners
A spindle that is too short
Shallow engagement in the gearbox follower
An oversized handle socket
A cracked socket insert
A worn gearbox follower
Movement between the lever and its internal hub
Le EN 13126-3:2023 window handle classification guide gives useful reference points. Its H1, H2, and H3 durability classes represent 5,000, 10,000, and 20,000 laboratory operating cycles, while category-of-use testing also considers free play, deformation, torque, and connection strength. But even an H3/180 handle can wobble after poor installation or excessive gearbox resistance.
Lab cycles are controlled. Buildings are not.
Droop: A Spring Failure or a Warning From the Gearbox?
A drooping window handle hangs below its intended horizontal or vertical position after the user releases it. People often assume the return spring has failed, and sometimes that diagnosis is correct.
Test it properly.
Remove the handle and operate it away from the window. If it still droops, feels vague, misses its click positions, or falls under its own weight, the handle assembly has probably worn internally.
But if the handle behaves normally after removal, the lock mechanism may be dragging it out of position.
Cette différence est importante.
A misaligned sash can load the cams against their keeps. A tight gasket can increase closing torque. A corroded drive rail can resist travel. And a worn gearbox can stop precisely between positions, leaving the lever hanging like the spring has failed.
Ask three questions:
Does the handle return correctly when removed?
Does the window lock smoothly while the sash is open?
Does droop appear only after the sash engages the frame?
A “yes, yes, yes” pattern points toward alignment, keepers, seals, or lock loading rather than a defective handle.
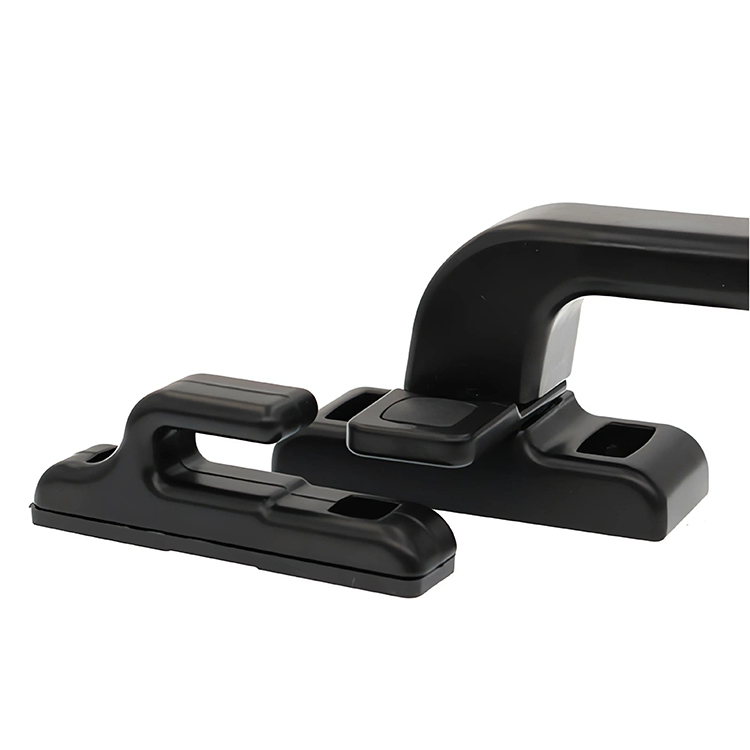
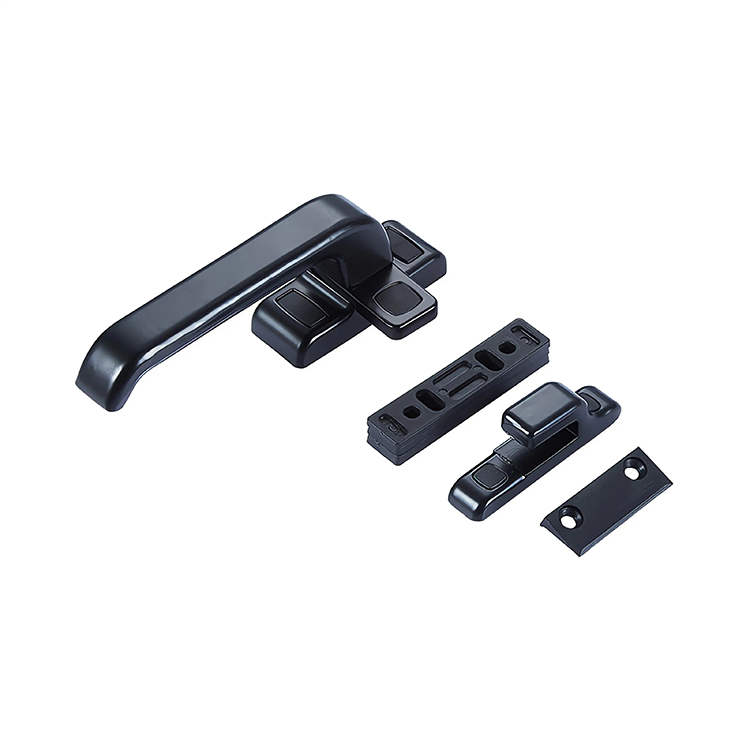
This is also why buyers should assess complete door and window handle systems by drive type, spindle interface, fixing geometry, and intended opening system instead of selecting a replacement by colour and silhouette alone.
Sticking: Stop Forcing the Handle
Force hides evidence.
When a handle moves freely with the window open but becomes stiff as the sash closes, the handle is usually reporting resistance at the locking points. The common causes are sash drop, frame distortion, keeper displacement, swollen timber, dirt, paint, damaged seals, or hinge wear.
Why replace the messenger?
Use this isolation sequence:
Step 1: Test with the sash open
Turn the handle slowly through its complete movement. Watch the locking cams, rods, hooks, or tongues.
If the mechanism binds while it is not touching the frame, inspect the handle, spindle, gearbox, drive rail, and contamination path.
Step 2: Support the sash
Lift the sash gently without twisting it, then test the handle again.
If a small amount of support makes the handle easier to turn, hinge wear or sash drop has shifted the lock away from its keepers.
Step 3: Mark the contact points
Use removable marker, chalk, or transfer material on the locking points to identify where contact begins. Do not grind or file the keeps blindly. Removing material may create weak engagement, uneven seal compression, or a security gap.
Step 4: Inspect dirt and corrosion
Coastal air carries chloride salts, including sodium chloride, NaCl. Moisture can concentrate those deposits around screws, springs, spindle sockets, damaged coatings, and concealed metal joints.
Clean the mechanism using a product approved by the window or hardware manufacturer. Avoid treating every sticky lock with a general-purpose penetrating spray. Some solvent-heavy products can wash out existing grease, attract contamination, attack certain plastics, or leave the mechanism dry after the carrier evaporates.
Step 5: Lubricate the right points
Lubrication reduces friction. It does not repair bent rods, worn gears, loose rivets, stripped threads, or an out-of-square sash.
The 2019 Haringey window-safety case is a sobering example. Investigators found a tilt-and-turn fault that allowed two operating modes to interact, while lack of maintenance, mainly lubrication, may have stopped the sash from self-engaging with its restrictor. The coroner concluded in 2020 that the fatal accident would not have occurred if the window had been rendered unopenable pending permanent repair.
That is the hard line: a faulty closing or restricting mechanism should not remain casually operable while someone waits for parts.
Loose Fixings: Why Tightening Sometimes Makes the Damage Worse
Loose fixings usually fall into four groups.
1. The screw has backed out
This is the simplest case. Remove it, inspect the threads and hole, confirm the correct length and diameter, then reinstall it to the manufacturer’s torque requirement.
Do not guess at torque. Small hardware screws can strip a polymer or thin aluminum substrate long before they feel “properly tight” through a hand screwdriver.
2. The screw spins without clamping
The thread or receiving material has failed. Repeated tightening will enlarge the hole.
The repair may require an approved repair insert, replacement reinforcement, a different engineered fastener, relocation supported by the product design, or replacement of the damaged component. The right choice depends on frame material and wall construction.
3. The screw bottoms out
A screw can feel tight while the handle base remains loose because the tip has reached the bottom of a blind hole or contacted an internal component.
Check screw length against:
Base-plate thickness
Frame-wall thickness
Position de renfort
Gearbox clearance
Required thread engagement
Coating and gasket build-up
4. The fixing is secure, but the base flexes
Thin castings, soft polymer spacers, weak profile walls, or unsupported cavities allow movement even when the screws remain tight.
This is a design or interface problem. More torque will often distort the base, crack the finish, or pull the screw head into the plate.
For broader component selection, the window and door hardware design resource connects handles with hinges, locks, latches, fasteners, and frame geometry. That systems view is far more useful than treating every loose lever as an isolated spare part.
Repair, Replace, or Escalate?
Repair the handle when the fault is limited, visible, and structurally sound. Replace it when its internal components have worn or cracked. Escalate the job when safety, locking, alignment, or frame integrity is uncertain.
A simple handle replacement is reasonable when:
The handle droops after removal from the window
The lever socket is worn but the gearbox follower remains sound
The handle body or return spring has failed
The lock mechanism operates smoothly with the handle removed
The replacement matches spindle size, projection, fixing centres, handing, rotation, and lock type
The frame and fixing holes remain undamaged
Repair the mounting system when:
The base plate moves
Fixing screws repeatedly loosen
Screw holes have enlarged
The original fastener length is wrong
Reinforcement is absent, displaced, or damaged
The base plate flexes before the lock begins moving
Inspect the full mechanism when:
The handle sticks with the sash open
The spindle turns without moving the locking points
The gearbox clicks, jumps, grinds, or stops abruptly
The drive rail bends or moves unevenly
Locking points fail to retract
Corrosion has reached springs, gears, rivets, or fasteners
Call a window professional when:
The window cannot be locked
The sash is heavy, unstable, or visibly dropped
The opening is above ground level
A restrictor or child-safety device has failed
The window serves as an emergency escape route
The frame has cracked
A tilt-and-turn window enters two modes at once
The mechanism must be disabled pending repair
The UK Health and Safety Executive states that windows presenting a fall risk in health and social-care settings should generally be restricted to an opening of 100 mm or less, with restrictors releasable only by a special tool or key. GOV.UK guidance also uses the 100 mm threshold when discussing fixed restrictors and fall protection under Approved Document O.
Different buildings have different legal and egress duties. Never install a keyed handle, restrictor, or permanent fixing without checking how occupants are expected to escape during a fire.
FAQ
Pourquoi la poignée de ma fenêtre bouge-t-elle ?
A wobbling window handle is a lever assembly with measurable side-to-side or rotational play caused by loose mounting screws, stripped fixing material, a worn spindle socket, shallow spindle engagement, base-plate flex, or internal gearbox wear; the correct repair depends on identifying which interface moves while the sash is unloaded.
Hold the base plate against the frame and move the lever separately. Base movement points toward fixings. Lever-only movement points toward the handle, spindle, or lock follower.
Pourquoi la poignée de ma fenêtre s'affaisse-t-elle ?
A drooping window handle is a lever that no longer remains at its intended resting position because its return spring, detent, hub, spindle connection, or connected gearbox cannot hold the designed angle; testing the handle after removal separates an internal handle failure from resistance created by the window mechanism.
A handle that droops off-window usually needs replacement. A handle that works normally off-window requires inspection of the lock, keeps, sash alignment, and seal pressure.
Comment réparer une poignée de fenêtre qui coince ?
A sticking window handle is repaired by first determining whether resistance comes from the handle, spindle, gearbox, locking points, keepers, hinges, seals, contamination, corrosion, or sash alignment, then correcting that root cause without forcing the lever or removing keeper material before the contact pattern has been measured.
Test the mechanism with the sash open. If it moves freely, focus on alignment and contact with the frame. If it remains stiff, inspect the drive components.
Puis-je resserrer moi-même une poignée de fenêtre qui bouge ?
A loose window handle can be tightened safely when the correct screws, threads, fixing holes, base plate, frame material, and internal clearances remain undamaged, but tightening is not a valid repair when screws spin freely, mounting holes enlarge, the profile cracks, or mechanism resistance repeatedly works the fasteners loose.
Use a hand screwdriver for control. Stop when the base clamps firmly. Do not compensate for stripped threads by applying more torque.
Faut-il réparer ou remplacer une poignée de fenêtre défectueuse ?
A faulty window handle should be replaced when its lever, spring, detent, socket, lock button, casting, or spindle interface has failed, while alignment, fixing, or gearbox problems should be repaired separately because installing a new handle onto a resistant mechanism often damages the replacement and leaves the original fault untouched.
Match the new handle by measurements and operating interface, not appearance. Confirm spindle section, spindle length, fixing centres, handing, rotation, projection, lock type, and screw specification.
Take Action Before the Handle Fails Completely
Start with the worst window.
Operate it open. Operate it closed. Support the sash. Isolate the handle. Check the spindle. Inspect the screws. Mark the locking contacts. Write down where resistance begins.
Then make one decision: tighten, realign, lubricate, replace the handle, repair the fixing substrate, or inspect the gearbox.
Do not keep forcing it.
For commercial projects, replacement programs, or OEM specifications, review the available window handle and hardware configurations and document the exact profile, spindle, screw centres, sash type, locking mechanism, finish exposure, and performance requirement before approving a sample.
A window handle repair should restore more than appearance. It should restore controlled movement, firm mounting, clear locking feedback, safe operation, and confidence that the next turn of the handle will do exactly what the user expects.