Looking for hardware solutions that meet European / American standards?
Use this guided inquiry modal to move from a generic quote form to a clearer technical conversation. Buyers can choose whether they need pricing, CAD / 3D files, or OEM / ODM support before sharing contact details.
Compatibility-first design across door / window systems
Repeatable production with clear inspection checkpoints
Documentation and change control for long-running programs
Responsive engineering support for fit and field feedback
Window sash lock replacement is routinely treated as a cosmetic parts swap. Find a lock with the same finish, compare two photographs, and order it.
That approach fails.
A sash lock can fit the existing holes, sit flat on the meeting rail, and turn through its full arc while barely catching the keeper. It looks installed. It may even feel locked. But the sweep is carrying only on its tip, the rails are not being pulled together, and the first serious load exposes the mistake.
Measure the pair.
Because the sweep and keeper form one mechanical interface, a replacement that copies the lock body but ignores keeper height, sash overlap, cam reach, and mounting-surface offset can mount neatly, rotate smoothly, and still provide shallow, unreliable engagement.
Why approve half a mechanism?
Start With the Lock Type, Not the Finish
Before taking window sash lock measurements, identify what is actually installed.
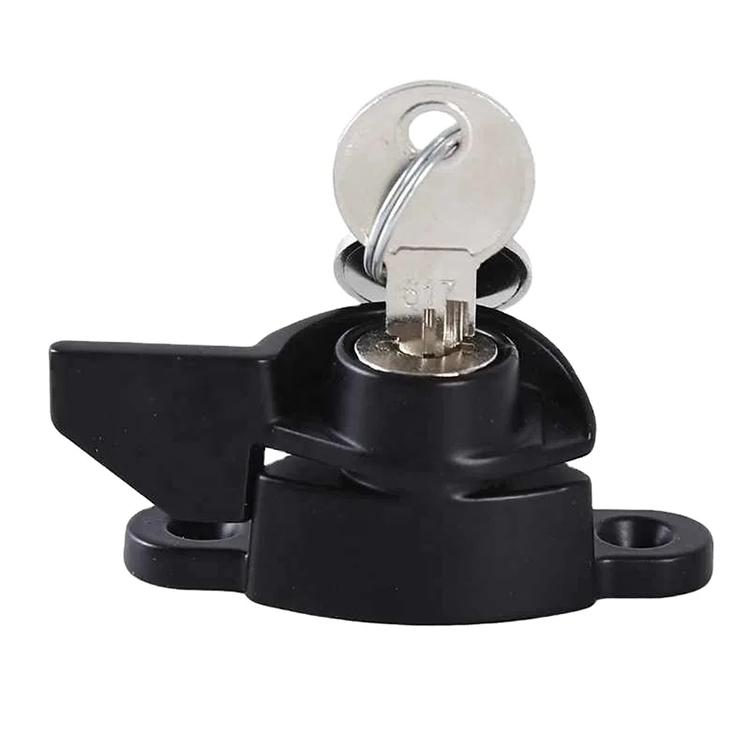
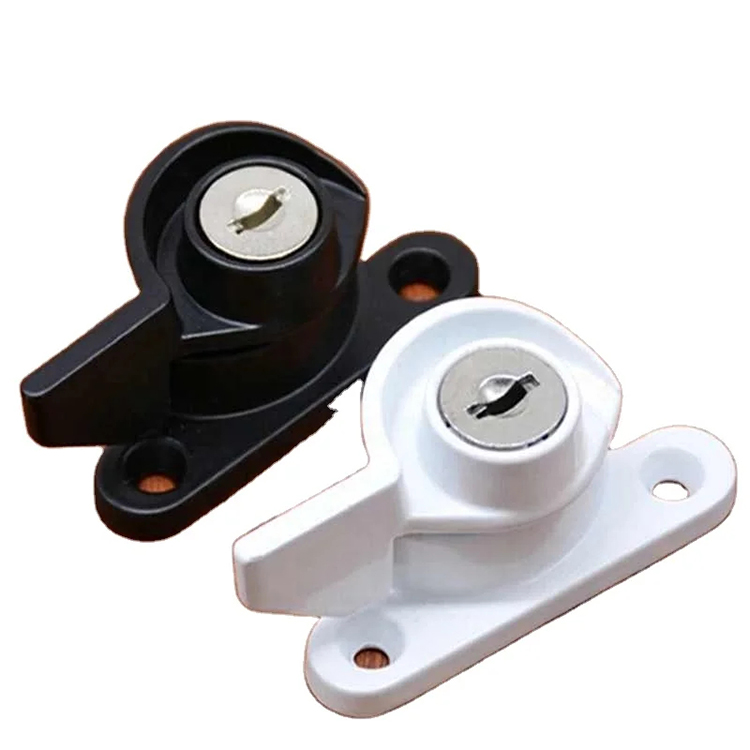
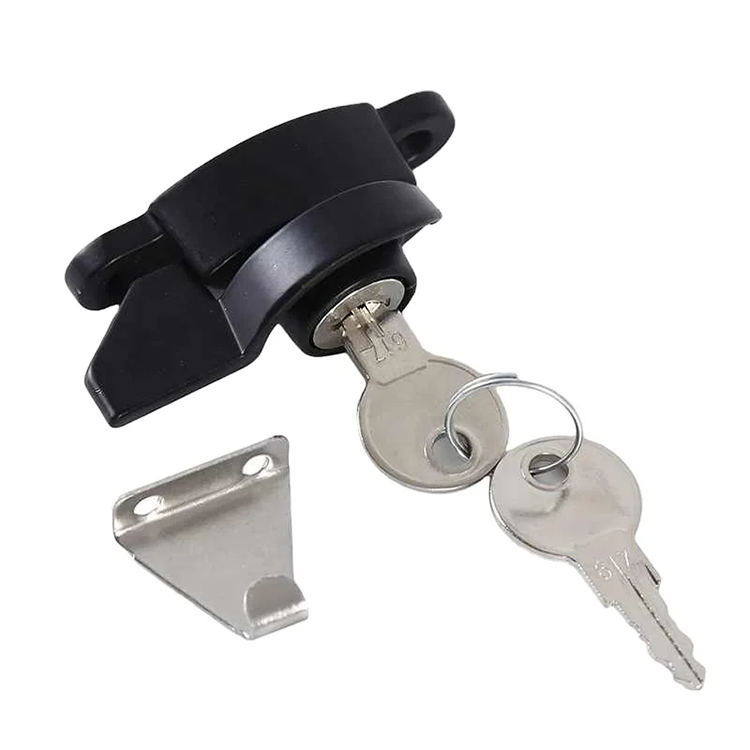
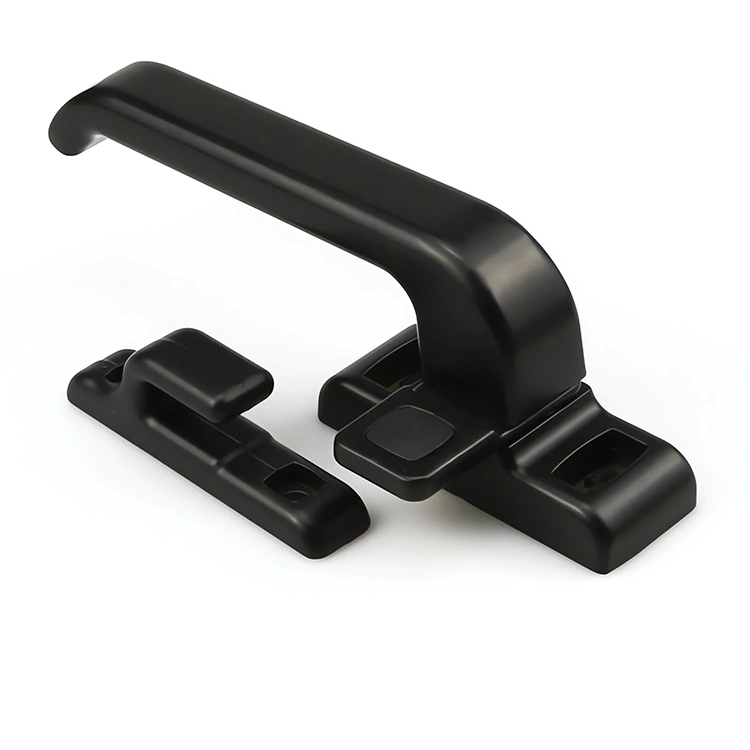
A “sash lock” is a broad category. It may use a crescent-shaped sweep, eccentric cam, sliding bolt, fork drive, touch latch, keyed cylinder, or another mechanism. CHIER’s guide to the different types of window locks explains why sash, cam, crescent, espagnolette, and multipoint locks should not be treated as interchangeable products.
For a typical sweep or crescent lock:
The lock body mounts on one meeting rail.
The keeper mounts on the opposing rail, sash, or frame.
The rotating sweep enters or passes around the keeper.
The final part of the rotation should draw the meeting rails together.
That pull-in action matters. A lock that only touches the keeper may block casual movement, but it may not reduce sash play, compress weatherstripping, or resist separation in the way the original assembly did.
I do not trust a replacement selected from a front-view photograph. A photograph helps identify the family, finish, lever style, and obvious hole pattern. It does not reveal the keeper’s engagement height, the sweep radius, or the relationship between two mounting surfaces.
Photos are evidence. Not dimensions.
For reference, the CHIER window sash lock range includes sweep, cam, crescent, fork-drive, and lever-operated designs. The category itself calls for checking base dimensions, fixing-hole spacing, cam reach, handing, lever clearance, and keeper height before selection.
The Window Sash Lock Measurements That Decide Fit
Use millimeters for the specification sheet, even when the original window was produced in inches. One inch equals exactly 25.4 mm, so recording both units prevents conversion arguments later.
A digital caliper is better than a flexible tape for small hardware. A steel rule, screwdriver, masking tape, pencil, and phone camera will cover the rest.
Record These Dimensions Before Ordering
Measurement
How to Measure It
What It Controls
Common Failure
Lock fixing-hole centers
Center of one mounting hole to center of the other
Alignment with existing holes or inserts
Screws enter at an angle or miss reinforcement
Keeper fixing-hole centers
Center to center on the keeper
Whether the keeper can reuse the original mounting points
New holes sit too close to damaged old holes
Lock base length and width
Maximum outside dimensions of the mounting plate
Rail fit, paint-mark coverage, and edge clearance
Base overhangs the rail or exposes old marks
Lock base height
Mounting face to the highest fixed part of the base
Lever and sash clearance
Lever rubs glass stops, blinds, or adjacent hardware
Keeper engagement height
Mounting face to the surface contacted by the sweep
Vertical alignment between sweep and keeper
Lock rotates but only catches the keeper tip
Sweep or cam reach
Pivot centerline to the furthest working edge of the cam
Engagement depth and pull-in
Cam misses, bottoms out, or over-travels
Mounting setback
Rail edge to hole centerline or pivot centerline
Lock position relative to the meeting-rail edge
Sweep follows the wrong path into the keeper
Sash overlap
Horizontal overlap of the two closed meeting rails
Available space for the lock-and-keeper interface
Keeper sits outside the cam’s usable radius
Surface offset
Difference in height between the two mounting surfaces
Keeper style and required step height
Lock binds before reaching the closed position
Screw diameter and length
Measure the shank, thread, and usable depth
Pull-out resistance and substrate engagement
Screws strip timber or bite only into thin metal
Handing and sweep direction
View from the room side with the window closed
Correct operating direction
Lever collides with the rail or rotates away from keeper
The keeper height deserves more attention than it gets. CHIER’s technical material warns that a keeper sitting only 2 mm too low can appear to catch during a light sample test while failing to pull the meeting rails together under production tolerances, coating thickness, and frame movement.
Two millimeters sounds minor.
It is not.
How to Measure a Window Sash Lock Step by Step
1. Close and Support the Window
Measure the assembly in its normal closed position before removing anything.
Check whether the sashes meet evenly. Look for a tapered gap, dropped sash, loose meeting rail, paint buildup, or a keeper that has already been moved from its original position.
If an upper-floor window could open or move after hardware removal, secure it first. Do not leave the opening unattended.
2. Photograph the Installed Lock and Keeper
Take clear photographs from:
Directly above the lock
Directly above the keeper
The side of the closed meeting rails
The lock in its open position
The lock in its fully closed position
The underside of both parts after removal
Place a steel rule in at least one photograph. Include any stamped manufacturer name, patent number, casting number, or model marking.
And photograph the wear.
A polished line on one edge of the keeper tells you where the sweep has actually been contacting. Uneven wear can reveal sash movement, a shifted keeper, or a cam that was never centered correctly.
3. Mark the Existing Positions
Before removing the hardware, place masking tape beside each part and mark:
The ends of the base
The keeper centerline
The sweep’s contact point
The rail edge
The closed lever position
This gives you a physical reference if the old screw holes are enlarged or the keeper moves while the screws are being removed.
4. Measure Sash Lock Screw Hole Spacing
Remove the lock and measure the mounting holes center to center.
Do not measure from the outside edge of one screw head to the outside edge of the other. Screw-head diameter can vary, and worn screws may not sit concentrically in the holes.
When both holes are the same diameter, measure from the left edge of the first hole to the left edge of the second hole. Matching-edge measurement produces the same center-to-center result and is often easier than estimating each center. CHIER uses the same method in its guide to measuring window handle fixing centers.
Record the lock and keeper spacing separately. They are not automatically identical.
5. Measure the Base and Mounting Setback
Measure the maximum length and width of the lock base.
Then choose one fixed datum, normally the inside edge of the meeting rail, and measure from that edge to:
The first fixing-hole center
The line connecting both fixing holes
The sweep pivot center
The outer edge of the base
This is often described as window lock backset measurement, although “mounting setback” or “edge distance” may be more accurate for a surface-mounted sash lock. Use the terminology shown on the supplier’s drawing, and make the datum unmistakable.
A number without a starting point is useless.
6. Measure the Sweep Cam
The sweep is not just a curved piece of metal. Its radius, thickness, underside profile, rotation angle, and projection determine how it enters the keeper.
Record:
Pivot center to outer working edge
Pivot center to inner hook surface
Sweep thickness
Height of the sweep above the mounting face
Approximate rotation angle
Direction of rotation
Engagement depth in the closed position
A replacement curved-lever sweep-cam sash lock may resemble the old unit while using a different cam path. The product specification still requires buyers to confirm fixing-hole spacing, cam engagement, sash overlap, handing, keeper details, and lever clearance.
7. Measure the Keeper in Three Dimensions
The keeper is not a flat outline.
Measure its:
Overall length and width
Fixing-hole centers
Base thickness
Total height
Engagement height
Opening width
Lip or hook thickness
Distance from rail edge to engagement point
Contact depth of the existing sweep
Keeper engagement height means the perpendicular distance from the keeper’s mounting surface to the surface that the sweep contacts. Measure it with the keeper removed and confirm the result against the installed surface offset.
Do not rely on total keeper height alone. Two keepers can have the same overall height while placing the working surface in different positions.
8. Check Sash Overlap and Surface Offset
Close the window without forcing it.
Measure how far the two meeting rails overlap. Then place a straightedge across the mounting areas and measure the step between them.
This offset decides whether the replacement needs:
A flat keeper
A raised keeper
A stepped keeper
Packers or shims
A lock with a lower or higher sweep plane
I dislike using stacks of loose washers as permanent keeper spacers. They create poor support, concentrate screw loading, and make repeat installation nearly impossible. Use a proper full-footprint packer or a keeper designed for the required height.
9. Inspect the Screw Substrate
A matching screw pattern means little when the original holes are stripped.
On timber windows, inspect for split wood, decay, oversized holes, or screws that were installed at an angle. On aluminum or uPVC profiles, determine whether the screws engage profile reinforcement, a threaded insert, a backing plate, or only a thin outer wall.
Record:
Screw head type
Thread diameter
Length below the hardware base
Pilot-hole size, where known
Available substrate depth
Presence of steel reinforcement or inserts
The cheapest repair is not the part with the lowest unit price. It is the repair that does not require a second visit.
Why an Exact Dimensional Match Can Still Be Wrong
Measurements describe the hardware. They do not automatically diagnose the window.
A replacement lock should not be used to force a distorted sash into place. If the sash must be pushed, lifted, or twisted before the lock can engage, inspect the balances, rollers, guides, hinges, meeting rails, and frame alignment.
The hard truth is simple: hardware cannot permanently correct a moving structure.
Safety Function Comes Before Convenience
A normal sash lock is not automatically a window fall-prevention device.
The U.S. Consumer Product Safety Commission’s April 7, 2026 window-safety release reported that an estimated 5,600 children aged 12 and under received emergency-department treatment in 2024 after falling from windows. About one-third required hospitalization, and CPSC knew of at least 25 child deaths from window falls during 2021–2023.
So do not market a basic replacement window sweep lock as child protection unless the complete assembly was designed and tested for that function. CPSC recommends purpose-built guards or stops and warns that screens do not prevent falls.
Egress matters too.
HUD’s 2023 NSPIRE inspection standard identifies a lock that requires a key, tool, special knowledge, or special effort to operate from inside a designated sleeping-room rescue opening as a potentially life-threatening obstruction, with a 24-hour correction timeframe in the covered housing programs. Check the applicable local building and fire rules before fitting a keyed lock to a bedroom or required rescue opening. Review the HUD egress standard.
Old Paint Changes the Work Method
Removing two screws can disturb more than hardware.
The EPA’s lead-paint guidance states that 87% of U.S. homes built before 1940 contain some lead-based paint, compared with 24% of homes built from 1960 through 1978. EPA advises assuming pre-1978 housing contains lead-based paint or using a certified professional to assess it.
Be cautious when drilling new holes, scraping painted meeting rails, sanding old hardware impressions, or vacuuming debris. Contractors working in covered pre-1978 properties may also have federal, state, or local lead-safe obligations.
Do Not Replace the Entire Window to Solve a Small Hardware Failure
A failed sash lock does not prove the whole window is finished.
The National Park Service guidance on historic windows says historic windows can often be repaired or upgraded and cites a 2002 Lawrence Berkeley National Laboratory study in which a storm window over a historic window achieved thermal performance similar to a new low-E vinyl replacement window.
That is an uncomfortable point for an industry that often jumps from “broken latch” to “replacement window quote.”
Repair the mechanism first when the sash, frame, and glazing remain serviceable.
Exact Replacement or Engineered Substitute?
An exact replacement reuses the original mounting pattern and reproduces the working geometry. An engineered substitute changes one or more features but is verified to provide equal or better fit and operation.
Use an exact replacement when:
The original model is available
The old lock and keeper geometry worked correctly
The mounting holes remain sound
The sash alignment has not materially changed
The safety function remains appropriate
Consider an engineered substitute when:
The original part is discontinued
Screw holes are stripped or damaged
The keeper needs a different height
The sash alignment has changed
Corrosion caused the original failure
The old lock never achieved full engagement
A revised safety or access-control function is required
But test it.
Install one sample on the actual window. Cycle it at least several dozen times. Check that the sweep enters the keeper without impact, pulls the rails together without excessive force, and releases without scraping.
Then try to move the sash by hand while the lock is closed. Inspect the keeper afterward for fresh edge marks or metal deformation.
For volume replacement or OEM sourcing, provide the supplier with:
Front, side, rear, and installed photographs
Lock and keeper drawings
Window profile cross-section
All measurements in millimeters
Screw and substrate information
Finish and corrosion requirements
Required test or compliance criteria
Annual quantity and packaging needs
CHIER’s OEM and ODM development process accepts drawings, profile sections, approved samples, photographs, critical dimensions, and mating-component information for fit and feasibility review.
FAQs
How do I measure a window sash lock for replacement?
To measure a window sash lock for replacement, close the sash, photograph the installed lock and keeper, remove the lock, then record the lock’s fixing-hole centers, base length and width, cam or sweep reach, mounting setback, keeper height, keeper-hole centers, sash overlap, and screw size in millimeters.
Also note the direction of lever rotation, the locked and unlocked lever positions, the mounting-surface offset, and any visible wear showing where the sweep contacts the keeper.
How do I measure sash lock screw hole spacing?
Sash lock screw hole spacing is the center-to-center distance between the mounting holes, measured across the actual hole openings rather than across screw-head edges; when both holes share the same diameter, measuring from the left edge of one hole to the left edge of the other gives the same result.
Record the lock and keeper dimensions independently. Do not assume both parts use the same spacing.
How should I measure a window sash lock keeper?
A window sash lock keeper should be measured as a three-dimensional mating part, including its overall length and width, fixing-hole centers, base thickness, engagement height above the mounting surface, slot or hook opening, edge setback, and the depth and location where the sweep cam actually contacts it.
Keeper height and engagement height are not always the same measurement. Use the working contact surface as the reference.
What is window lock backset measurement?
Window lock backset measurement is the distance from a defined sash or frame edge to the lock’s operating centerline, pivot, fixing-hole centerline, or mounting reference, depending on the manufacturer’s drawing; for surface-mounted sash locks, “setback” or “edge distance” may be the more accurate term.
Always identify the datum in writing. “Backset: 22 mm” means nothing unless the supplier knows which edge and centerline were used.
What is the best replacement sash lock and keeper?
The best replacement sash lock and keeper is the set that matches the window type, fixing-hole pattern, keeper height, cam reach, sash overlap, mounting surface offset, handing, fastener substrate, required pull-in, corrosion exposure, and any egress or fall-prevention duty—not simply the closest-looking finish.
A slightly different-looking lock with verified geometry is a better replacement than a visual copy with shallow engagement.
Can I replace only the sash lock or only the keeper?
You can replace only the sash lock or only the keeper when the retained component is undamaged and its dimensions, material, alignment, and engagement geometry are confirmed compatible with the new part; otherwise, replacing both as a tested pair is the safer way to avoid shallow engagement or forced operation.
Do not mix components because the screw spacing happens to match. Test the assembled interface on the actual window.
Turn Your Measurements Into a Replacement Specification
Do not send a supplier one photograph and ask, “Do you have this?”
Send the lock type, fixing centers, base size, keeper dimensions, cam reach, surface offset, sash overlap, screw details, profile material, handing, and installed photographs. State whether the window serves as a bedroom rescue opening or needs a separate fall-prevention device.