Looking for hardware solutions that meet European / American standards?
Use this guided inquiry modal to move from a generic quote form to a clearer technical conversation. Buyers can choose whether they need pricing, CAD / 3D files, or OEM / ODM support before sharing contact details.
Compatibility-first design across door / window systems
Repeatable production with clear inspection checkpoints
Documentation and change control for long-running programs
Responsive engineering support for fit and field feedback
A replacement window handle may match the original color, lever shape, base outline, and even the familiar screw pattern, yet still fail because the rear drive is wrong, the spindle is 5 mm too short, or the lever collides with the frame.
Why take that risk?
I take a blunt view of replacement hardware: the front of the handle is mostly sales material. The rear is the specification.
Suppliers cannot confirm window handle compatibility from a dark photograph of a black lever still attached to a closed sash. They need evidence of the operating interface, fixing geometry, window profile, handing, and clearance. Without that evidence, every confident recommendation is partly a guess.
And “almost compatible” is not compatible.
The Handle Is Visible, but Compatibility Is Hidden
A replacement window handle has to perform three separate jobs:
Attach securely to the existing window profile.
Transfer the correct movement into the lock or gearbox.
Move through its full operating range without binding or striking nearby parts.
The appearance of the lever proves none of those things.
An espag window handle normally uses a square spindle to turn an espagnolette gearbox. A fork-drive or blade-drive handle uses a shaped projection that engages matching internal hardware. A cockspur handle closes over a separate wedge. Tilt-and-turn handles may use a square spindle but also depend on a defined operating sequence.
The word “universal” causes trouble here. Some replacement handles include adjustable or interchangeable spindles, but that does not make the base dimensions, screw positions, lever offset, lock function, or gearbox engagement universal.
The hard truth?
A handle that bolts onto the sash can still be the wrong handle.
The Photo Pack a Supplier Actually Needs
A supplier should be able to see the complete operating system, not merely the decorative face. I recommend sending at least seven clear photographs, preferably in their original resolution.
1. The Installed Handle in Its Locked Position
Take a straight-on photograph from inside the room while the window is fully closed and locked.
The image should show:
The complete handle
The full mounting base
The surrounding frame or sash
The direction in which the lever points
Any nearby blind, screen, reveal, or second sash
The hinge side of the window, where possible
This photograph helps the supplier identify the general handle family, lever orientation, offset, approximate base size, and available clearance.
Do not crop too tightly. Context matters.
2. The Handle at Every Operating Position
Photograph the handle in each normal position, such as:
Locked
Open
Tilt
Ventilation
Restricted opening
A tilt-and-turn handle may have three positions. A simple espag handle may rotate through 90 degrees. Some restricted or tilt-before-turn systems use special lock logic.
What happens when a generic replacement changes that sequence?
At best, the user becomes confused. At worst, the hardware gives false feedback or allows two operating modes to engage incorrectly.
3. The Front of the Removed Handle
Remove the handle only after the window has been closed, secured, and safely supported. Never leave an upper-floor opening unsecured while looking for a replacement.
Place the removed handle on a flat, well-lit surface. Photograph the complete front face beside a steel rule.
This view records:
Lever shape
Base shape
Screw-cover design
Key cylinder or push button
Brand marks
Wear patterns
Overall scale
Wear marks can reveal more than buyers expect. Scraping on one side of the base may indicate poor clearance or a handle that was already offset incorrectly.
4. The Rear Drive Interface
This is the most important photograph.
Place the handle face down and photograph the rear at a true 90-degree angle. Include a ruler or digital caliper in the same plane as the component being measured.
The supplier needs to see whether the handle has:
A square spindle
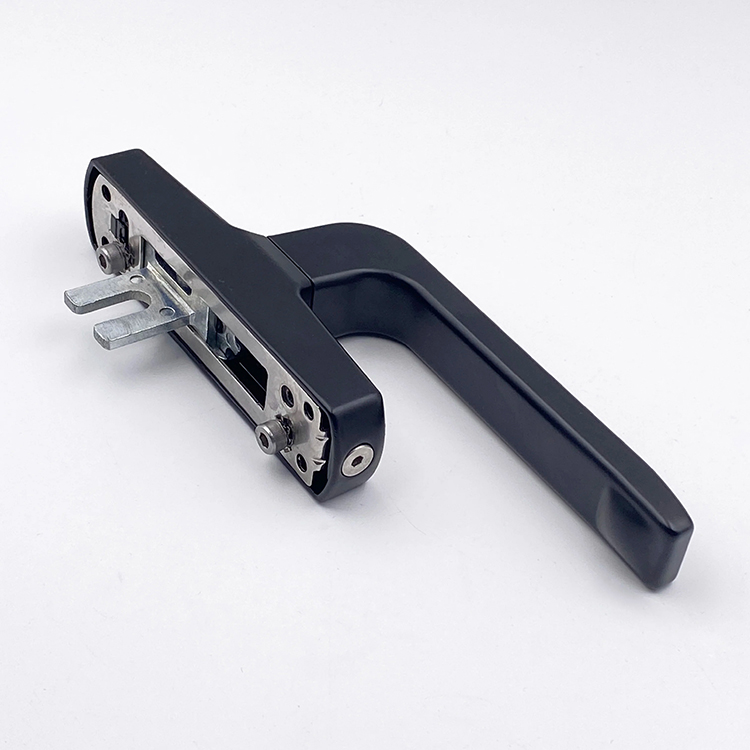
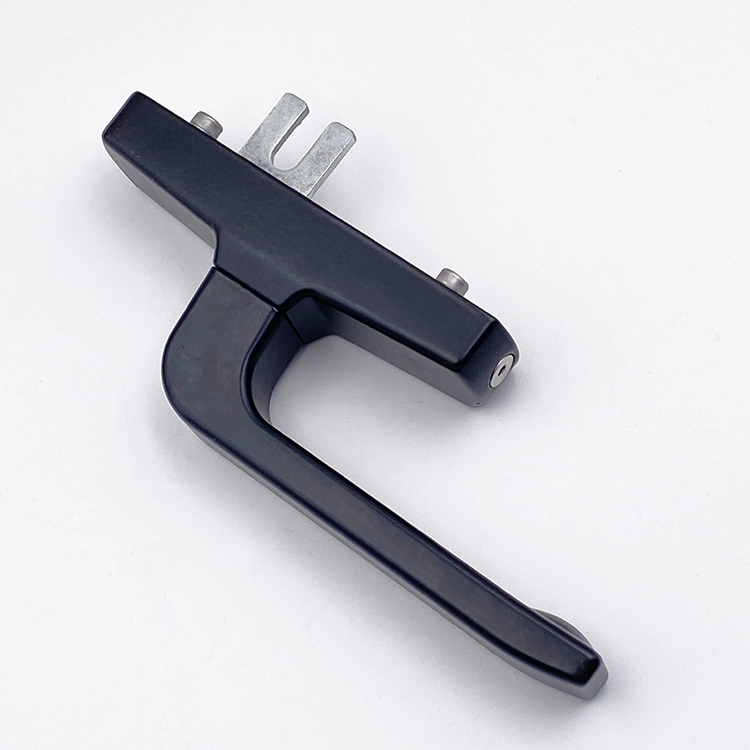
A two-prong fork
A rectangular blade
A projecting tongue
Rear mounting tabs
A proprietary drive plate
No operating spindle at all
The distinction between a fork-drive and square-spindle window handle cannot be confirmed from the front. ERA, for example, describes its Cadenza handle as a product specifically intended for slimline aluminum casements using a matching fork-drive espagnolette system. Meanwhile, HOPPE explains that the common 7 mm square spindle and 43 mm screw distance come from DIN 18267 dimensional conventions, not from a rule making every window handle interchangeable. Review ERA’s fork-drive application and HOPPE’s standards summary for the distinction.
5. A Side View of the Spindle, Fork, or Blade
A straight rear photograph shows shape. A side photograph shows projection.
Place the rear mounting face against a flat surface and photograph the drive component from the side. The image should clearly show where the measurement begins and where the spindle, fork, or blade ends.
For a square spindle, measure from the flat rear mounting face of the handle base to the spindle tip.
Not from the decorative cover.
Not from the front of the lever.
From the mounting face.
6. The Exposed Fixing Holes and Gearbox Opening
After removing the handle, photograph the window profile where it was mounted.
Show:
Both fixing holes
The spindle or drive opening
Threaded inserts
The visible gearbox follower
Old drill holes
Profile damage
Gaskets or packing plates
Corrosion or distortion
This photograph helps determine whether the problem is really the handle.
A replacement handle will not repair a rounded gearbox follower, broken lock case, stripped threaded insert, bent drive plate, or misaligned sash. Selling a new lever for a damaged gearbox merely delays the complaint.
Clean the component carefully before assuming no code exists. Manufacturers sometimes place identifying marks beneath covers, beside the spindle, or on the gearbox faceplate.
A partial code may be enough to identify the original hardware family.
The Measurements That Decide Window Handle Compatibility
Measure in millimetres. Hardware suppliers and window-system manufacturers generally work from metric dimensions, and converting back and forth introduces avoidable rounding errors.
A digital caliper gives the clearest results for spindle sections, fork thicknesses, screw diameters, and smaller offsets. A rigid steel rule is usually adequate for base dimensions and longer projections.
Assuming all projecting drives are interchangeable
Spindle section
Measure across the flat faces
Fit inside the gearbox follower
Recording “square” without stating 7 × 7 mm or 8 × 8 mm
Exposed spindle length
Rear mounting face to spindle tip
Engagement depth
Measuring the spindle and handle body together
Fixing centres
Centre of one screw hole to the centre of the other
Alignment with existing holes
Measuring between screw-head edges
Base width and height
Maximum contact dimensions of the mounting plate
Frame coverage and clearance
Assuming all 43 mm handles have the same base
Handle projection
Mounting surface to the outermost lever point
Clearance from blinds, reveals, screens, and frames
Measuring lever length instead
Lever offset
Spindle centreline to the lever centreline
Left/right clearance and handing
Ordering an inline handle to replace a cranked model
Screw specification
Diameter, thread, head, and usable length
Secure attachment
Reusing screws because they came from the old handle
Rotation angle
Record movement between locked and open positions
Full lock travel
Assuming every handle turns through the same angle
Locking function
Key, push button, non-locking, or restricted
User control and safety function
Selecting by appearance alone
Spindle Length Must Be Measured From the Right Surface
For an espag window handle, the spindle is the square metal bar projecting from the rear.
Measure its exposed length from the flat rear mounting face to the tip. Then measure the square section across two opposite flat faces.
A spindle described only as “30 mm” is incomplete. The full description should look like this:
7 × 7 mm square spindle, 30 mm exposed projection from the rear mounting face.
Too short, and the spindle may barely engage the gearbox follower. It may operate during a quick test, then slip or damage the follower under repeated use.
Too long, and the spindle can bottom out before the base seats against the sash. Installers then tighten the screws harder, preload the lock, and create a stiff handle.
That is bad fitting disguised as determination.
Screw Hole Spacing Is Centre to Centre
Measure the distance from the centre of one fixing hole to the centre of the other.
If both holes have the same diameter, measure from the left edge of the first hole to the left edge of the second. Matching-edge measurements produce the same centre-to-centre result and are often easier to take accurately.
Many modern espag handles use 43 mm fixing centres and a 7 × 7 mm square spindle. Common does not mean guaranteed. HOPPE notes that DIN EN 13126-3 covers performance classification and testing, while dimensional examples such as the 7 mm spindle and 43 mm fixing distance are addressed by DIN 18267.
One matching number proves very little.
Base Dimensions Prevent Ugly Surprises
Record the maximum width and height of the base where it touches the sash.
Also note:
Corner radius
Cover-plate dimensions
Raised rear bosses
Gasket thickness
Spindle position within the base
Distance from each fixing hole to the base edge
A narrower replacement base may expose faded paint, old drill marks, damaged uPVC, or an unfinished section of aluminum profile.
It might work mechanically.
It will still look wrong.
Projection and Lever Sweep Protect Clearance
Measure outward projection from the sash mounting surface to the furthest point of the lever. State the handle position used for the measurement.
For example:
Closed projection: 52 mm
Projection at 90 degrees: 68 mm
Maximum operating sweep: 105 mm radius
Projection matters where the window sits behind roller blinds, Venetian blinds, shutters, insect screens, curtains, secondary glazing, deep reveals, or another opening sash.
An extra 8 mm can be enough to catch a blind every day.
That is not a minor inconvenience. It is a repeat warranty complaint.
Match the Measurement Method to the Handle Type
Espag Window Handles
An espag window handle normally has a square spindle that rotates a gearbox connected to an espagnolette locking strip, mushroom cams, rollers, hooks, or shootbolts.
Record:
Spindle width
Exposed spindle length
Fixing centres
Base dimensions
Screw details
Inline or cranked form
Lock function
Required rotation
Gearbox backset, where known
Do not assume a uPVC window automatically uses a standard espag handle. Older and proprietary systems exist.
Fork-Drive and Blade-Drive Handles
Fork and blade systems require more photographic evidence because their drive geometry may be specific to one hardware family.
Record:
Overall fork or blade width
Internal fork gap
Prong thickness
Projection
Engagement depth
Pin diameter, if present
Distance between the drive and fixing holes
Rotation direction
Left- or right-hand configuration
“Fork drive” is a family description, not a complete size.
Two forks can look similar and remain mechanically incompatible.
Cockspur Window Handles
A cockspur handle closes by moving a projecting nose over a wedge mounted on the frame. It may have no operating spindle.
Record:
Spur or step height
Nose length and position
Fixing-hole pattern
Base dimensions
Wedge dimensions
Handing
Clearance over the frame
The spur height deserves special attention. A replacement with the wrong step height may fail to compress the seal or may not close over the wedge at all.
Tilt-and-Turn Handles
Tilt-and-turn handles often use a square spindle, but the handle is part of a multi-position operating system.
Record:
Spindle section and projection
Fixing centres
Locked, tilt, and turn positions
Direction of rotation
Tilt-before-turn or turn-before-tilt logic
Key or button restrictions
Gearbox brand and model
Any restrictor or child-safety function
A generic lever may physically attach while interfering with the intended operating sequence.
Physical attachment is not system compatibility.
This Is More Than a Returns Problem
Some sellers treat an incorrect replacement window handle as a small e-commerce problem: send another unit, issue a refund, move on.
That view is too casual.
On April 7, 2026, the U.S. Consumer Product Safety Commission reported that an estimated 5,600 children aged 12 and under received emergency-department treatment in 2024 after falling from windows. About one-third required hospitalization. The agency also knew of at least 25 deaths from 2021 through 2023, with 80% of those fatalities occurring between May and October. Read the CPSC’s 2026 Window Safety Week data.
A handle alone does not prevent window falls. Let us be precise.
But hardware that fails to close fully, gives false locking feedback, jams during operation, or interferes with a restrictor can make a window system less predictable.
The CPSC’s December 21, 2023 recall of approximately 12,000 Pella Architect Series casement windows shows how seriously system-level hardware failures can be treated. The sash could detach and fall; one detachment had been reported, and affected windows had sold for between $700 and $10,000 each. Consumers were instructed to keep them shut and locked until repaired. Review the Pella casement-window recall.
The lesson is not that a replacement handle will cause a sash to detach. The lesson is that window hardware operates as a connected system. Handles, locks, hinges, restrictors, profiles, fasteners, and sashes cannot be evaluated as isolated decorations.
A more sobering case came from Haringey, London. Following the 2019 death of a toddler who fell from a high-rise window, investigators identified faults that allowed tilt and turn modes to operate simultaneously and made the window difficult to close correctly. Homes for Haringey changed its procedures so windows with faulty mechanisms would be left impossible to open until fully repaired. Read the Local Government Association’s Haringey window-safety case study.
That case should end the argument that a closing-mechanism problem is “just maintenance.”
The UK Health and Safety Executive also states that, where risk assessment identifies a fall hazard in health and social-care premises, suitable window openings should be restricted to 100 mm or less, and restrictors should require a special tool or key for disengagement. See the HSE window-fall guidance.
So yes, identify the replacement handle correctly.
And stop treating operating hardware as trim.
Build a Supplier-Ready Compatibility Pack
Do not email a supplier with one photograph and the sentence, “Can you supply this?”
Send a structured schedule.
Minimum Identification Data
Window opening type
Frame and sash material
Existing handle family
Drive type
Spindle or fork dimensions
Fixing centres
Base dimensions
Handle projection
Lever offset
Handing
Locked lever direction
Required rotation
Lock or gearbox model
Screw specification
Locking function
Finish
Quantity
Destination market
Minimum Supporting Photographs
Installed handle in the locked position
Installed handle in every operating position
Complete front of removed handle
Complete rear of removed handle
Side view of spindle, fork, or blade
Fixing holes and gearbox opening
Window edge and hinge position
Profile cross-section, where available
Labels, logos, and stamped codes
Every measurement shown beside a scale
Example Specification
Window type: Side-hung uPVC casement Handle family: Inline espag Spindle: 7 × 7 mm Exposed spindle length: 30 mm Fixing centres: 43 mm Base size: 65 × 17 mm Closed projection: 52 mm Lever direction when locked: Down Handing: Reversible Locking function: Key locking Screws: M5, final length to be confirmed Finish: Matte black Quantity: 200 units Files attached: Installed front, removed front, rear interface, side spindle, fixing holes, gearbox stamp, and profile drawing
For volume purchasing, the supplier should return more than a product photo. Ask for a dimensional drawing, stated tolerances, material and finish details, screw specification, interface confirmation, and a fitted sample.
CHIER’s window-hardware quality control and testing process treats interface fit, critical dimensions, operation, finish, and assembly condition as first-article checks before volume production continues. That sequence makes sense: approve the real fit first, then release the quantity.
Anything less is theater.
FAQs
What photos do suppliers need to identify a replacement window handle?
Suppliers need clear, scaled photographs of the handle installed, the front face, the rear drive interface, the fixing holes, the window profile, the receiving gearbox opening, and any labels or stamped codes, because appearance alone cannot confirm spindle length, fork geometry, screw centres, handing, or operating clearance.
Photograph the handle in every operating position and include a steel rule or caliper in the same plane as each measured component. A ruler placed several centimetres behind a spindle creates perspective error and may be worse than no scale.
How do I measure a replacement window handle?
To measure a replacement window handle, remove the old handle safely and record the exposed spindle projection from the rear mounting face, the spindle section, centre-to-centre screw spacing, base width and height, outward projection, lever offset, handing, screw specification, and locking function in millimetres.
Measure the drive interface first. A perfect base measurement is useless when the replacement uses a square spindle and the original window requires a fork, blade, cockspur, or proprietary connection.
Are all uPVC window handles fitted at 43 mm centres?
No, not all uPVC window handles use 43 mm fixing centres, even though 43 mm centres with a 7 × 7 mm square spindle are common on modern espag systems; spindle projection, base size, offset, screw thread, locking function, and gearbox design can still make two apparently similar handles incompatible.
Treat 43 mm as one data point. Confirm the full interface, especially on older windows, imported profile systems, tilt-and-turn units, and windows that have already received replacement hardware.
How can I identify an espag window handle?
An espag window handle is identified by a square spindle projecting from its rear, usually positioned between two fixing points, which turns an espagnolette gearbox or multipoint locking strip; confirmation still requires measuring spindle width and projection, fixing centres, base geometry, and the receiving follower inside the sash.
Common clues include an inline or cranked lever, two vertically aligned fixing screws, and a 90-degree operating movement. However, some tilt-and-turn and proprietary handles share similar visible features, so inspect the lock before ordering.
Can a supplier identify a window handle from a photo alone?
A supplier can sometimes identify the broad handle family from photographs, but photographs alone rarely prove full compatibility because they do not reliably show hidden engagement depth, exact screw spacing, fork thickness, spindle section, profile clearance, lock travel, or whether the existing gearbox is damaged rather than the handle.
A responsible supplier should request dimensions or a physical sample before confirming compatibility. Be suspicious when a seller guarantees fit from one front-facing photograph without asking about the rear interface.
Send Evidence, Not Guesswork
Remove the old handle safely. Photograph the front, rear, side, fixings, gearbox opening, profile, and every identifying mark. Measure the drive interface, spindle projection, screw centres, base, projection, offset, handing, and lock function in millimetres.
Then ask for a dimensional drawing and a fitted sample.